
This project was designed with children in mind. As scissors and small parts are used adult supervision is required at all times. It will make a fun craft activity to share with your children as the nights draw in!
You will need:
- a piece of orange card 15x15cm
- a piece of black card 5x24cm
- a piece of black card approx. 6x18cm
- a strips of acetate (or clear plastic from packaging - be careful of sharp edges). 2 measuring 1x6cm and 2 measuring 1x8cm
- silver paper
- cotton wool
- a scrap of card approx. 2.5x3.5cm
- scissors
- glue (I find a wet glue like PVA best)
- pencil
- ruler
- star punch
- circle punch or a coin to draw around

Step 1
On the scrap of card draw a wing shape like the one in the picture and cut it out to make a template.

Step 2
Draw around this template 8 times on the piece of black card that is 6x18cm. Cut out the wings.

Step 3
Use the circle punch (or draw around a coin) to make 4 black circles using the same piece of card you cut the wings from.

Step 4
Spread a little glue onto the corner of a wing. Stick this corner behind one of the black circles. Spread glue onto the corner of another wing and stick this corner behind the black circle too but on the other side to make it look like a flying bat. Make 3 more bats in this way. You can vary the position of the wings to make it more interesting.

Step 5
Spread some glue onto the top 1cm of one of the acetate strips. Stick this to the back of one of the bats. Repeat with the other bats and acetate strips.

Step 6
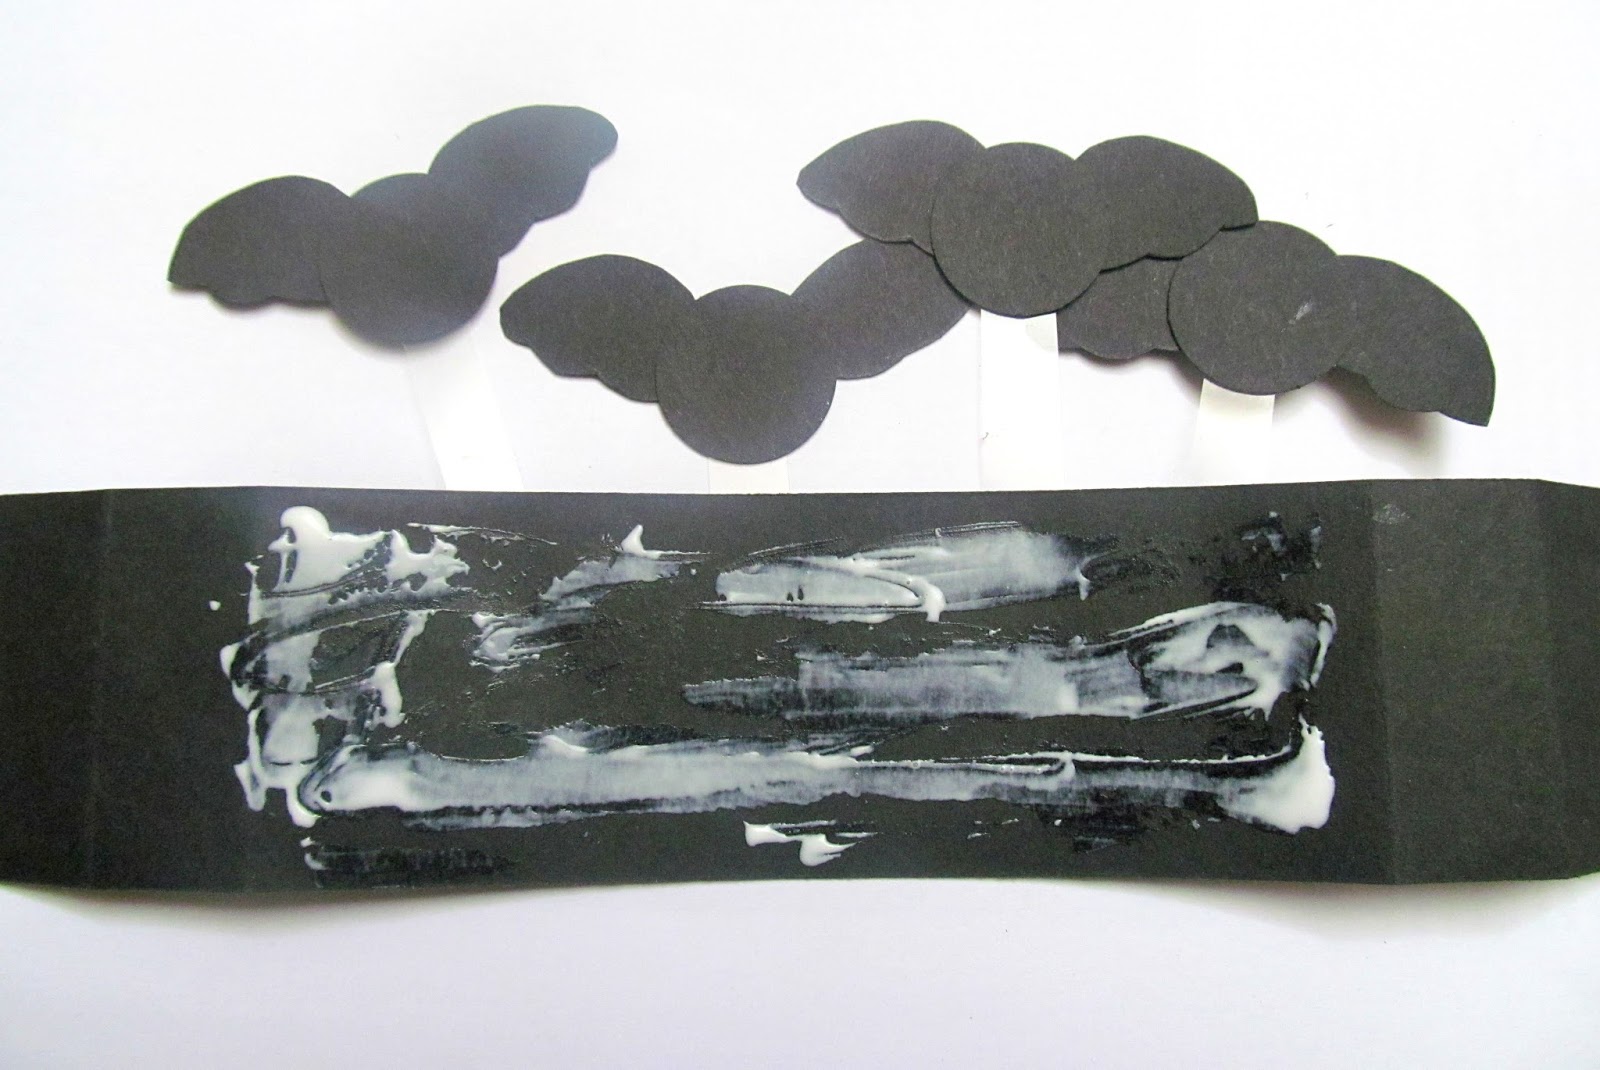
Take the piece of black card measuring 5x24cm and place it in front of you with the long side running along the top and bottom (landscape). Mark lines at 2.5cm, 4.5cm, 19.5cm and 21.5cm running vertically. Fold the card inwards along these lines.

Step 7
Lay the card you've just folded down in front of you with the folded over parts sticking upwards. Spread some glue onto the bottom 2cm of a strip of the acetate with a bat stuck on top - make sure the glue in on the front of the acetate. Stick this strip to the piece of black card that is flat in front of you. Repeat with the other acetate strips.

Step 8
Turn the piece of black card over (so that the acetate strips are now underneath) and flatten out the folds so it lays flat. Spread glue along the front of the central 15cm.
Step 9
Tear and pull the cotton wool until it is thin enough to look like fog. Now stick this onto the glue on the black card.

Step 10
Use the star punch on the silver card to make about 9 stars (or however many you want!). If you don't have a star punch you could always cut them out by hand or use star stickers. Glue the stars randomly onto one side of the piece of orange card.

Step 11
Take the strip of black card with the cotton wool glued to it and place it cotton wool side down. Spread glue onto the left hand side up to the first fold line. Line this up with the bottom of the back of the orange card and stick in place. Do the same with the right hand side.
 |
| Add caption |
Your decoration card is complete! If you'd like to send it as a card just write a message on the back.

You could also try:
- Add a Halloween greeting onto the orange card with the stars
- Use glitter paper of glitter glue to make stars
- Make bats in different sizes
- Use grey card instead of orange to give an even foggier feel
Very cute! Love the flying bats and your super easy to follow tutorial!
ReplyDeleteI linked over from Make the Scene Monday where I am participating with my Spooky Halloween and Free Subway Art I would love it if you'd stop by.
Hugs, antonella :-)
Thank you Antonella! I'll pop over to see your Halloween creativity too!
DeleteHow fun...I love the fog :) Pinned!
ReplyDeleteThanks Steph! I made one like this for my cousin's little boy last year to entertain him - he found it fun too!
DeleteGood job! =) Thanks for linking up at the Pinterest Power Party!! Hope you have a great weekend!
ReplyDeleteDanielle
SewMuchCrafting.com
Thanks Danielle! I have a Pinterest addiction so I always pop over to the party!
DeleteSuch a fun and timely project and what a great and easy to follow tutorial. Thanks for sharing on beColorful.
ReplyDeletep
Thanks Pamela! It's always fun getting ready in the build up to Halloween.
Delete