Friday, 30 August 2013

My Favourite UK Crafter of the Week - personalised nursery decor from Little Nest Box

Before I start this I have to admit, I don't have any children. That doesn't stop me looking at children's products though; I do know some children, but also because they're so cute! I love colourful objects and bright colours always catch my eye, so although I wasn't looking for children's decor, I couldn't help but stop by and take a closer look when I first saw this shop.

As usual, this post is in no way sponsored or influenced. The crafter featured is genuinely a favourite of mine; all quotes are the crafter's own and the opinions are mine. So, with this in mind this week's UK Crafter of the Week is...

Little Nest Box

Little Nest Box is the work of Charmaine who is based in London. Her shop's motto is 'Say Hello To Colour' which definitely comes across in her creations from an array of soft, warm colours to bright, primary tones. Something I admire about Charmaine's work is that although there is such a range of colours, all her pieces have a unity about them sharing the same beautiful designs. I also love that the range of colours allows customers to match the decor to their homes and needs perfectly.
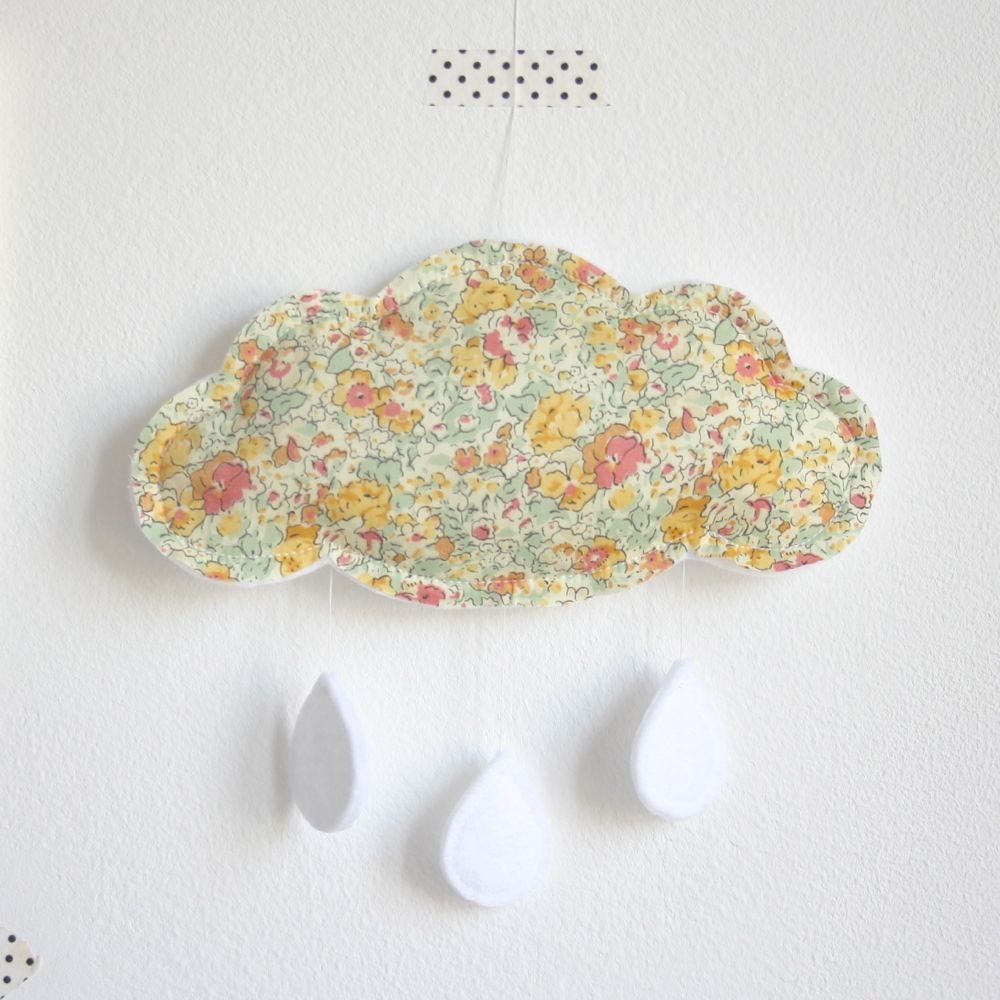
Cloud Baby Crib Mobile - Liberty London Yellow Peach
Cloud Baby Crib Mobile £26.37 Etsy

Although Charmaine's work is aimed at children and decorating nurseries, I think there are a lot of her items which would appeal to adults too. The rainbow garland below would look stylish in a child's modern bedroom and  equally as good as a party decoration (with the added bonus of it being reusable as it's made of felt rather than paper which tends to get damaged when stored). Some of her prints too are fantastic quotes and aspirations for children but will grow with them and be meaningful in adult life as well. She also admits she adores 'wandering though antique and junk markets' for 'vintage finds' and these clearly influence some of her work too with an interesting mix of modern and vintage style and colour which will appeal to a wide range of ages. 
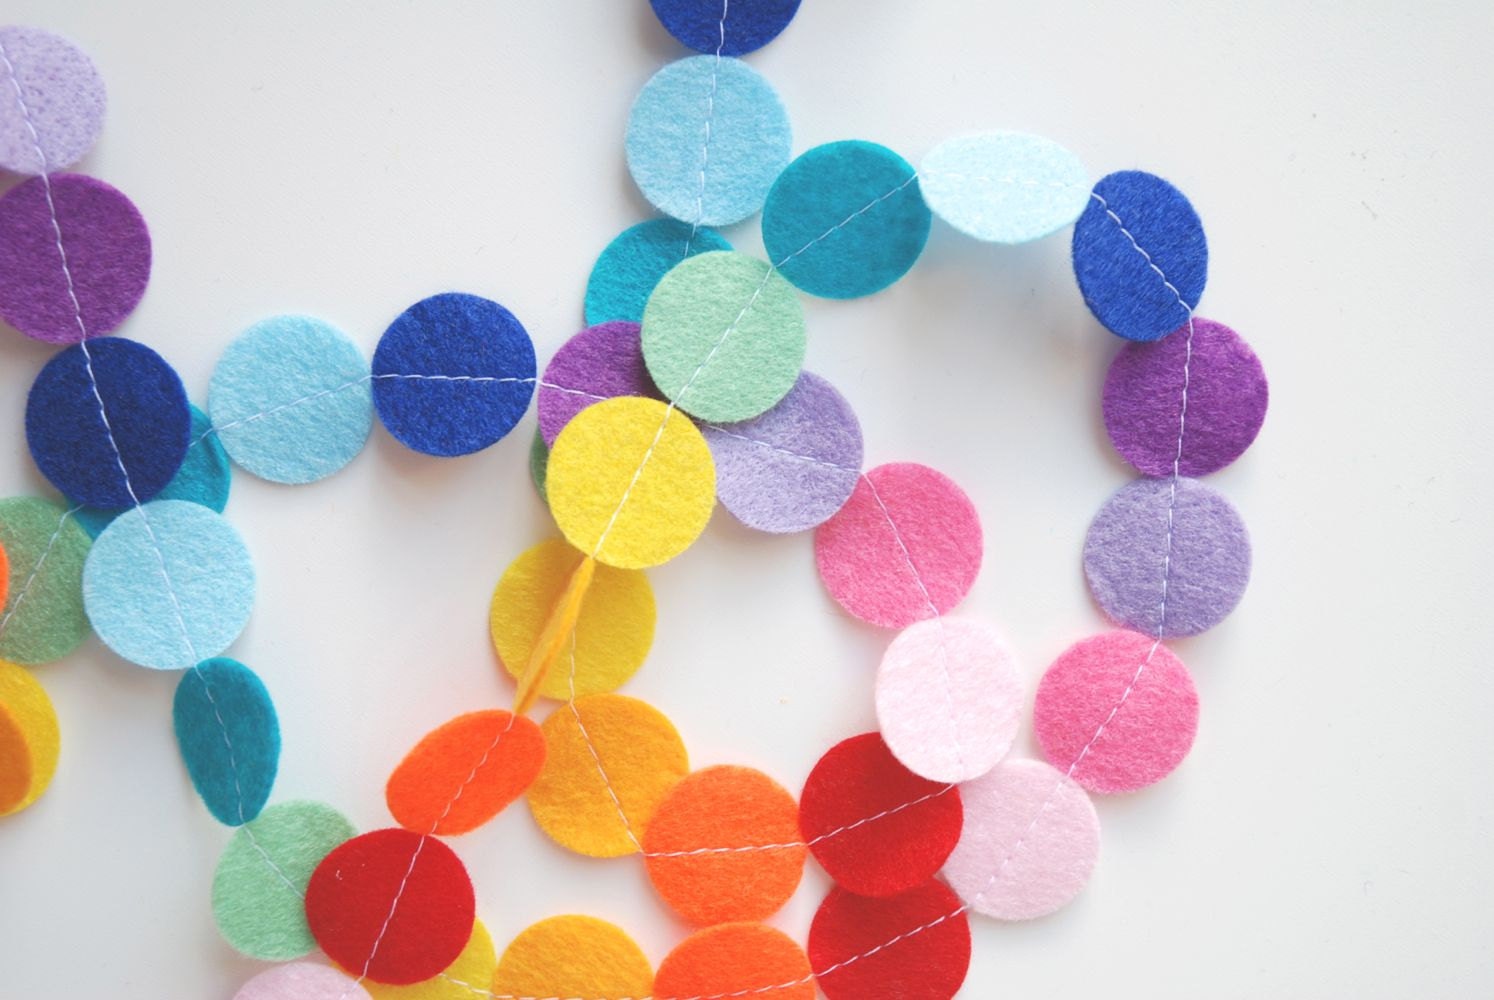
Felt Garland - Rainbow Circles
Felt Garland - Rainbow Circles £19.78   Etsy

Before setting up her business Little Nest Box, Charmaine worked as a fashion buyer (which she says resulted in her owning a 'ridiculous number of shoes') and this eye for style and colour can clearly be seen in her designs. I love how her work will appeal to children with its simplicity and sense of colour while at the same time being modern and stylish to complement the decor of a house as a whole. Most of it wouldn't look out of place anywhere in a home; it's not just for the nursery. Many families with young children I know love the idea of including their little ones throughout the home, and I'm sure would welcome it in the form of beautiful decor rather than scattered toys!
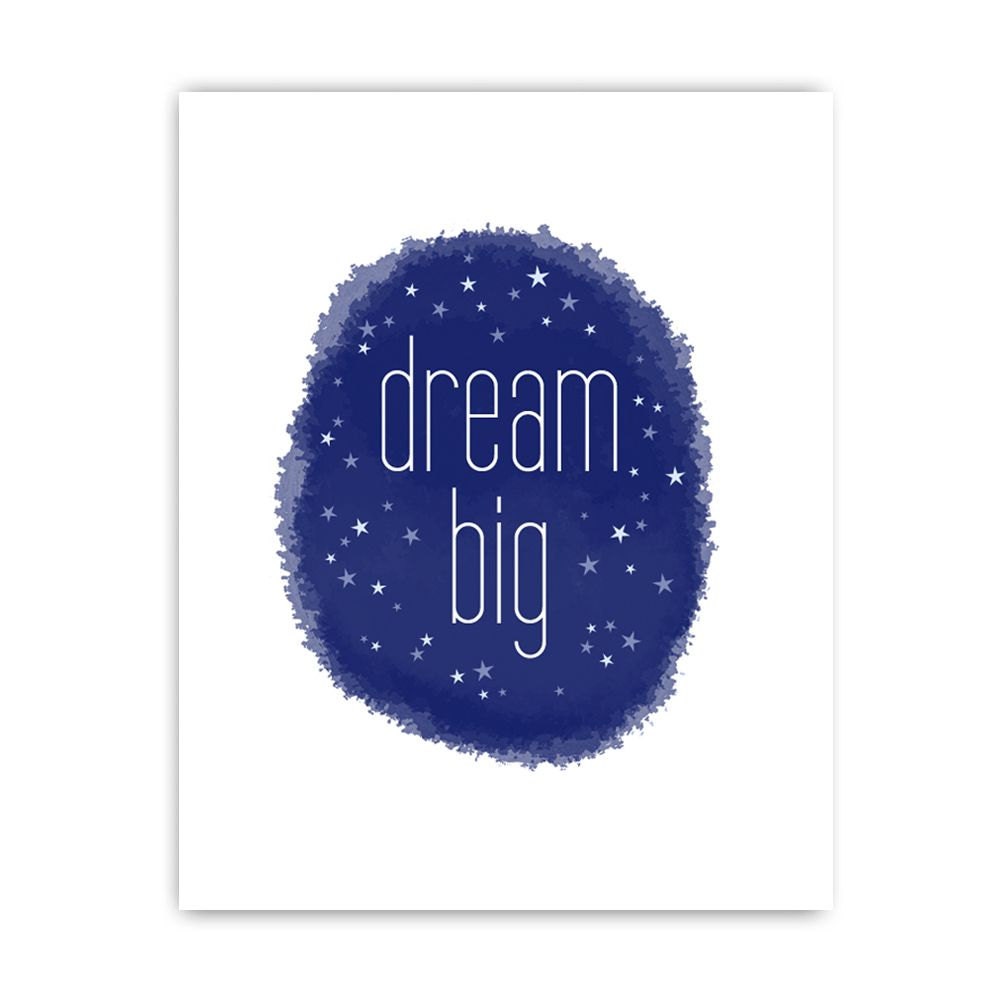
Dream Big Print - Navy Dark Gray Grey
Dream Big Print £16.48  Etsy

Another great feature is that some mobiles can be customised to fit in with bedroom decor you already have, maybe a quilt or wallpaper, giving your home a co-ordinated look. There are lots of colours and combinations to choose from and Charmaine is more than happy to help with recommendations and advice to work with her customers so they are happy with their choices (again, I'm sure her fashion buying experience comes in useful here!).

Butterfly Baby Crib Mobile - Personalised Custom
Butterfly Baby Crib Mobile £29.67  Etsy

So, if you're looking for some beautifully modern babies' and children's decor for your own home or as a gift, I'd recommend looking at Charmaine's shop.

You can see more from Little Nest Box here:
Little Nest Box blog
Little Nest Box shop
Little Nest Box on Facebook
Wednesday, 28 August 2013

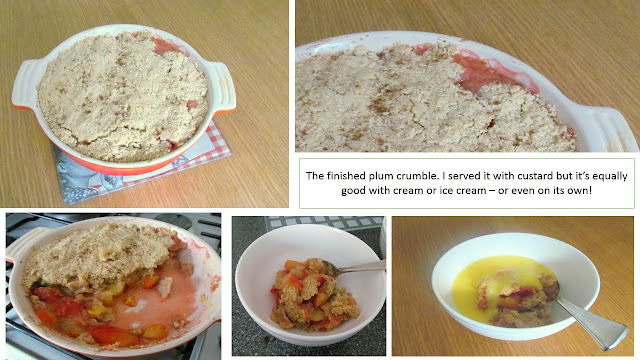
Plum Crumble - Seasonal Recipe

When I was little the August Bank Holiday (that's just been on Monday) seemed to mark the end of summer. It was usually the weekend we'd come back from the family holiday and it was only a few days until the start of the new school year. Although it was sad that summer was over, it also meant that autumn was on its way with lots of treats of its own! One of my favourites was (and still is) fruit crumbles. In our back garden we had an apple tree that was starting to fruit and meant lots of lovely tasty treats, but it was a little unreliable and only seemed to share its apples every other year! However, we also had a plum tree which fruited every year and made lovely crumbles of its own.

While out shopping yesterday I spotted some juicy orangy-red plums which are right in the middle of their best season here in the UK. Well, that meant only one thing on my mind - plum crumble! So last night I made one for dessert and here I share the recipe with you.

plums

Plum Crumble Recipe

You will need:
  • 6 large plums
  • 175g plain flour
  • 1tsp baking powder
  • 90g butter
  • 90g brown sugar   
  • Optional - cinnamon, nutmeg, crushed nuts or oats for the topping
  • A baking dish (I used one that was 20cm round)
Serves 4-6 people (depending on how greedy you are! I divided mine into 4 generous portions -because I am greedy...)

Step 1
Turn the oven on and set it to 170C/ 350F. Let it heat up while you prepare the crumble.

Step2
Wash and slice the plums. Arrange them in the bottom of the dish.

Plum crumble recipe

Step 3
In a bowl mix together the flour and baking powder. Add pieces of butter and rub it into the flour with your finger tips until it sticks together and looks like crumbs.

Crumble topping recipe

Step 4
Use a fork to mix the brown sugar into the flour and butter mixture.

Step 5
Now tip the flour mixture over the top of the fruit in the dish. Pat it down so the mixture covers all the fruit and goes up to the sides of the dish. (The fruit will bubble up as it cooks so this helps to seal it in).

If you want to add any additional toppings, now's the time. I sprinkled mine with a little nutmeg. Cinnamon, crushed nuts and oats also go well either on their own or all mixed together. 

How to make plum crumble

Step 6
Put the crumble into the pre-heated oven and bake for 40 minutes until the top is light golden brown and the fruit is starting to bubble through. If the topping looks like it's getting too brown, cover the dish with foil until the fruit is cooked.

Plum crumble recipe

This recipe can be made with any soft fruit you have. Some of my favourites are apple, blackberries or rhubarb.

Friday, 23 August 2013

An English Country Afternoon, with a free download

On Friday I was lucky enough to have lunchtime free at the same time as my Mum, my brother and his girlfriend and we took the opportunity to go out into the countryside at Bradfield, just on the outskirts of Sheffield. We visited The Schoolrooms at low Bradfield and had a nice relaxed lunch and a catch up.


The Schoolrooms at Bradfield


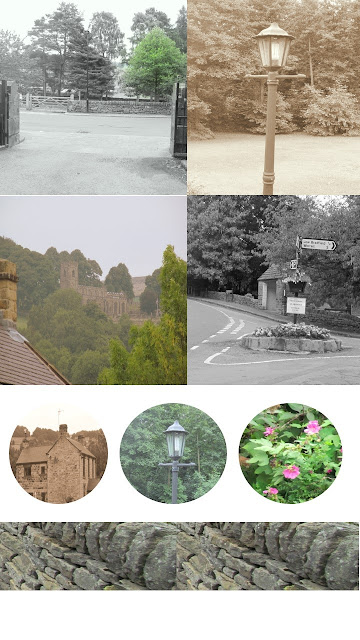
While I was there I thought I'd take the opportunity to take some photos to share here on my blog. My brother's girlfriend is half French, half American and grew up in Oregon and she loves the English countryside and always says it's the image that Americans have of the UK! I know I have a lot of visitors from the USA here so I thought I'd share them with you too. As well as everyone else around the world... (I've been learning how to look at my stats and I'm surprised how many countries are shown as having readers!)


Low and High Bradfield


In many ways Bradfield is a quintessential English village with a village green for cricket, a village hall with farmers markets and events, a post office and tearooms, and a pub or two. It also has amazing views of the Yorkshire countryside looking out over the verdant hills and fields decorated with hedgerows, trees and sheep. It's a great place for taking a walk too with many round walks through the woods, fields and around the reservoirs where you can start and finish in the village (or the pub, depending on who you're walking with!).

Views of Bradfield


 Free digital download for crafting


I then thought a better way to share than just looking is being able to download some pictures too. And as a crafter I thought I'd share them in a crafty way. So I made a PDF picture sheet for crafting and (after a lot of pressing buttons and hoping it would work) managed to get it into a format I can share with you.

There are images of the village which I've been playing with with my editing program which are great for scrapbooking and card making. The three circle images show details from around the village and can be used for adding details to your creations or in jewellery making. Across the bottom of the page is a traditional dry stone wall strip which can be used as boarders. 


Free craft sheet download
This photo sheet is free to download using the link below.


This link will take you to a copy of the PDF which you can save or print. It is free to use in your own crafting as many times as you like. DO NOT share or sell copies. (As I've said before, I'm not very technical - the image in the link looks a little odd but when you press print the true image shows in the PDF!)

Free Bradfield pictures PDF 

Feel free to use the pictures as you'd like, and I always love to see what people are working on so it would be great to see your creations too!

More instant downloads of York and France are available to buy in my Etsy shop.
France download
French market download
York download

My Favourite UK Crafter of the Week - handprinted gift wrap and gifts by Handmade and Heritage

While I was writing my post on gift wrapping earlier this week I was reminded of some beautiful hand printed gift wrap I'd seen before. So I looked back to where I found it and it's become part of the latest feature in my Favourite Crafters series. I love wrapping gifts (sometimes I buy extra gifts just as an excuse to try more wrapping ideas!) and finding beautiful ways to present items I've spent time finding for friends and family to make them extra special and thoughtful.

As usual, this post is in no way sponsored or influenced. The crafter featured is genuinely a favourite of mine; all quotes are the crafter's own and the opinions are mine. So, with this in mind this week's UK Crafter of the Week is...

Handmade and Heritage

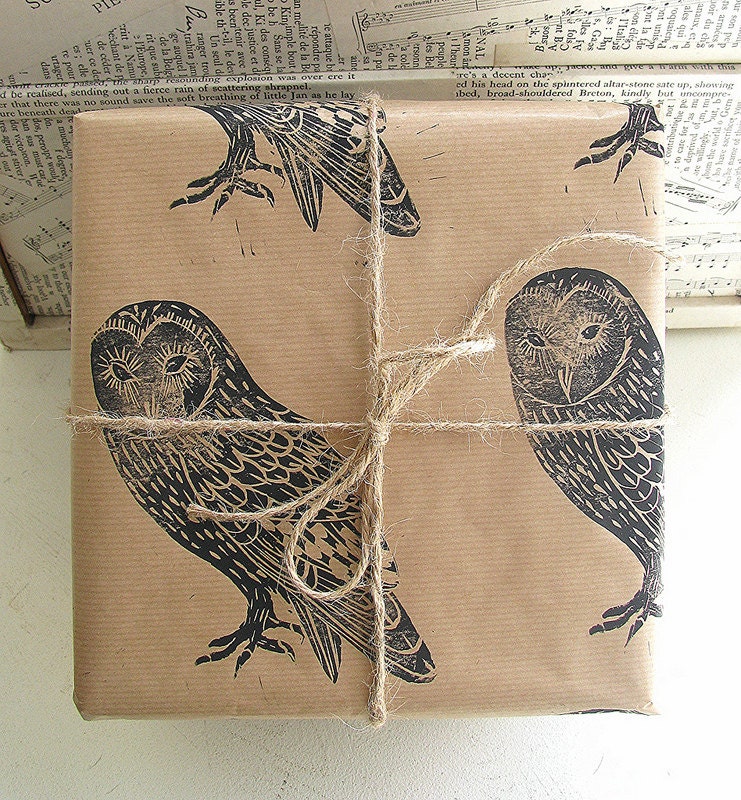
As well as gift wrap, I also love birds (as anyone who's seen how my bedroom is decorated will tell you!) so I was intrigued when I first saw some brown paper gift wrap with owls printed on it. Looking into it to find more details, I discovered that the wrapping was in fact handprinted using lino printing and based on original drawings by Amiee, the creative talent behind Handmade and Heritage. I love that each piece is handmade and unique with slight variations because of the production technique and, as it's made to order, is made especially for you, the customer.


Barn Owl Rustic Bird Gift Wrap - Three Sheets
Barn Owl Rustic Gift Wrap, 3 sheets £6 Etsy

Amiee has an artistic background having studied fashion and clothing and working as a milliner. She was also inspired by her creative parents and their 'ability to make something out of nothing' which I love the idea of; it also reminds me of how Amiee's gift wrap is made to order so when you buy it is essentially 'nothing' waiting to be created! I think this makes it a truly personal and thoughtful choice as a way to share the present you've chosen for a loved one. She describes the creation of Handmade and Heritage as an ' evolution of many creative ideas over the years' inspired by and combined with a 'love of traditional craft, baking and gardening' into which she could 'incorporate my love of British nature and birds'. I love all these elements and think they truly come across in all her work. 

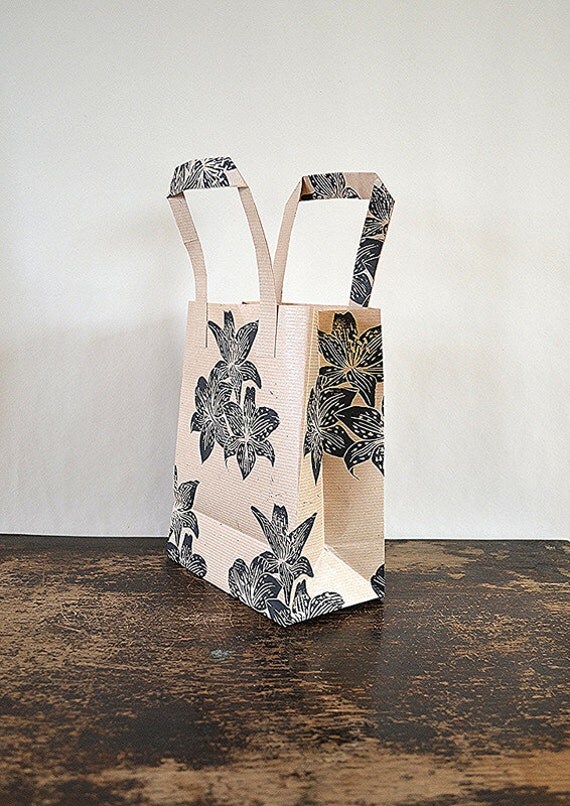
Hand Printed Brown Paper Gift Bag  - Lily
Hand printed brown paper gift bag, £2 Etsy

I've tried hand printing on brown paper before to make my own wrapping, but I'm not very neat and end up with smudges, inky hands and streaks all over the paper! I really admire the quality of Amiee's work and patience to hand print all her items. She describes it this way, 'there is something very calming about printing, I think its the repetitive nature of it', maybe I could learn something from this in my own crafting! Amiee turns her dining room table into her workshop in the evenings after her looking after her two young children but is 'hoping to have a studio space soon so I can claim my dining table back!'

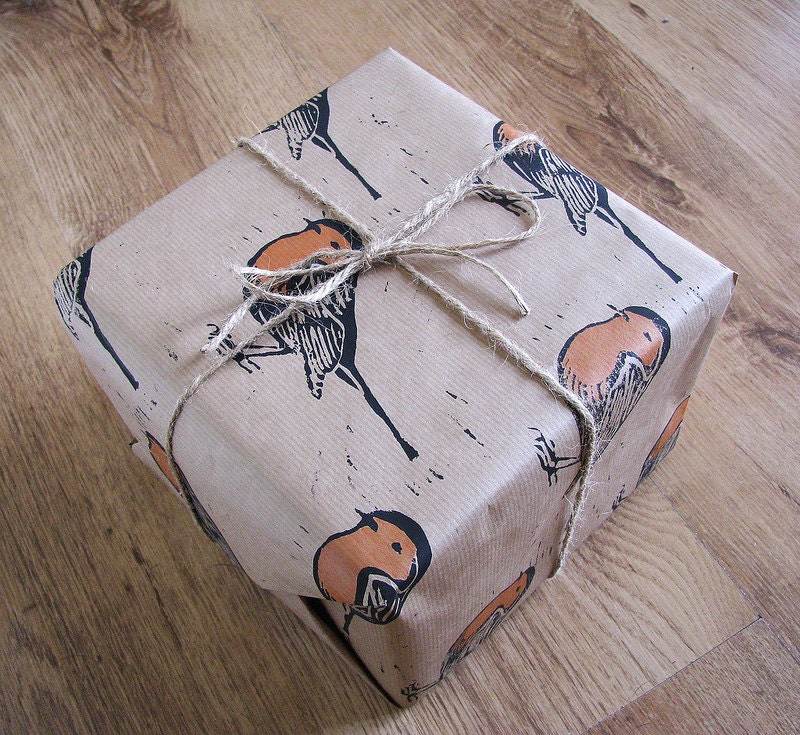
Robin Red Breast Rustic Gift Wrap - Three Sheets
Robin Red Breast Gift Wrap, 3 sheets £6 Etsy I think it would make great birthday or Christmas paper

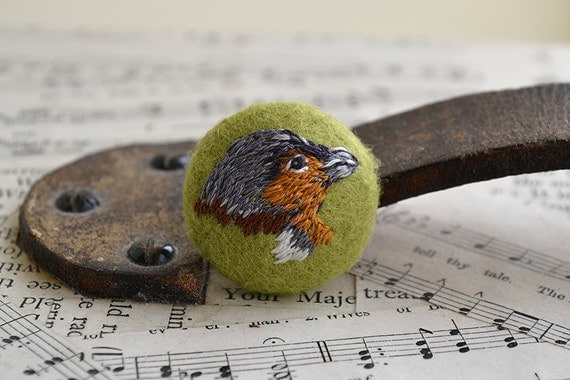
As well as gift wrap, Amiee also creates embroidered gifts (perfect for having something to wrap up!) using her crafting experience from over the years. These include hand stitched bird buttons beautifully embroidered onto wool felt which make great accessories for clothes or making into unique jewellery or accessories. I love adding items like this and vintage brooches to my bags as I can change them to match my outfit, mood or the season. I think the button below would look lovely for the upcoming autumn months with its soft moss green and rusty orange. 

Hand Embroidered Chaffinch Bird Button 35 mm
Hand Embroidered Chaffinch Bird Button £7 Etsy

I love the rustic, natural and traditional look of all of Amiee's work and if you'd like to discover more too you can find here in these places:


Thursday, 22 August 2013

How To Make a Paper Gift Bag

A bit of a different post today. I've written a guest tutorial for the blog Through The Looking Glass which belongs to Denise who I met through Etsy.

The post was published yesterday on her site where I show you how to make one of these paper gift bags.

handmade gift bags
A selection of my handmade gift bags

If you'd like to learn how to make one pop over to Denise's blog and have a look!

Paper Gift Bag Tutorial on Through The Looking Glass

handmade gift bag
The gift bag I make in the tutorial

Tuesday, 20 August 2013

September Birthday Ideas - thoughtful ideas with links to September

With September only a few days away, here are some specially themed ideas for those with September birthdays - whether you're buying for someone or celebrating yourself.

Each idea has a specific link to the month to make for some thoughtful birthday ideas. 

Cards and Gifts

september birthday gifts


1. Sapphire Necklace £17.08 Firebird Jewellery Etsy
    The beautiful blue sapphire is the birthstone for September.

2. Set of 7 Soaps £28.91 Soap For Your Soul Etsy
    September is named after the Latin word for seven - so why not have a set of 7 gifts?

3. Plum Nail Polish £11 Nails Inc 
    Plums come into season in September, let your nails match.


4. Apple Tree Card £2.75 Pink Flamingo Handcrafting Folksy
    Another fruit that comes into season in September. This is one of my one of a kind upcycled cards.

5 & 6 Virgo and Libra Prints £12.48 Anne Garrison Studio Etsy
     Virgo is the sign of the zodiac until Sept 22nd when Libra takes over

7. Russet Fabric Card £4.50 Pink Flamingo Crafting Etsy
    The colour the leaves start to turn at the start of autumn. The autumnal equinox is around 21st September
    in the Northern Hemisphere.

8. Aster Notebook £16.43 Wolfies Bindery Etsy
    Asters are the birth flowers for September. In the language of flowers they mean love, faith and wisdom.


Party Decoration Colours

September is a month of equinoxes; the vernal equinox signals the start of autumn in the northern hemisphere and the spring equinox starts off the warmer months in the southern hemisphere. They take place around the 23rd of the month.

With that in mind here are some party decoration colour ideas based on autumn and spring!

September party colours


September Foods

Whether going out for dinner, throwing a party or cooking a special meal at home, these in season foods are perfects for a September birthday.

Based on what's in season in the UK:
  • apples - think apple pie, apple fritters or apple sauce with meats
  • pumpkin - pumpkin soup or pumpkin pie
  • plums - delicious just cut in half and grilled with a little brown sugar served with creme fraiche
  • apricots - wonderful in stews with chicken or in a cake for desert
  • aubergine - think ratatouille with courgettes which are also in season
  • figs - just beautiful on their own or stuffed and baked
  • beetroot - delicious in salads, especially mixed with goat's cheese
  • pears - think pear and berry crumble or poached in wine
  • oysters, crab, mussels


Sunday, 18 August 2013

Resuable Gift Wrap ideas - where the wrapping is a present in itself

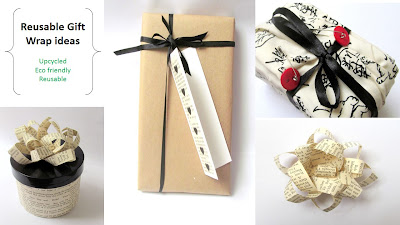
Everyone loves to receive a present (you should see me on Christmas morning!) and when it's beautifully wrapped it makes it all the more special.  One thing though that seems a real shame is the pile of used gift wrap that is lying around after with the only option to throw it away. Now don't get me wrong, I love to scavenge through the wrapping remains and save bows, ribbons and anything else that can be reused (there's a running joke in my family about some gift boxes that everyone's received a present in!), but what about if the whole of the wrapping could be used again? This thought is what led me to these ideas...

Reusable gift wrap Pink Flamingo Handcrafting

Fabric Gift Wrap 

I've seen this idea in one or two places and loved it. The idea is that the wrapping is reusable as, unlike paper, it isn't stuck down and doesn't tear. I also thought it you be particularly apt for a crafty friend who you are giving a sewing themed present to, especially with a couple of added reusable decorations. 

For this gift I cut a piece of fabric to the right size for the box, put the box into the centre of the material and folded the two longer edges into the middle of the top of the box.  Then I folded the remaining fabric of the two shorter sides so that the raw edges were hidden and folded this over the top of the box securing it in place with safety pins. Next I tied ribbon around the box then removed the safety pins one at a time to add a red button before pinning back on the present.

Fabric gift wrap

Covered Tub or Canister

I can't help saving used jars, tubs, boxes...well, anything that could be a handy container again. Sometimes I use them as they are as storage such as these jars filled with buttons, or I cover them in pretty papers to keep things in like this chocolate box which is a home for my candles. They also make good containers to put gifts in as then the recipient can use them again too.

reused storage containers


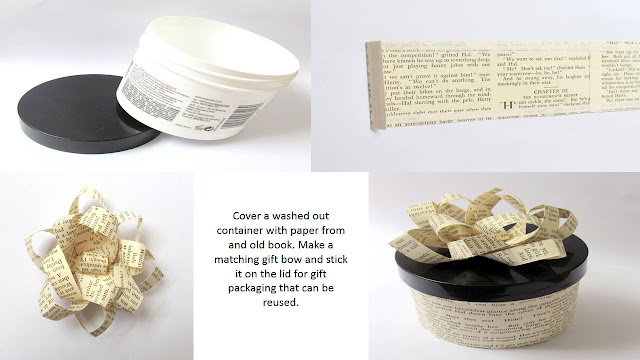
Here I've used an empty, washed out conditioner tub. As it had a plain black lid it was easy to keep this and just cover its body. I just cut a strip of paper long enough to wrap around the tub with an extra inch added on for the overlap. I folded the end of one of the short edges over to make it neat, then stuck double sided sticky tape on the back and stuck it around the tub with some extra tape at the overlap.

upcycled gift wrap

The matching bow on top can be made using the instructions further down.

Bookmark Gift Tag

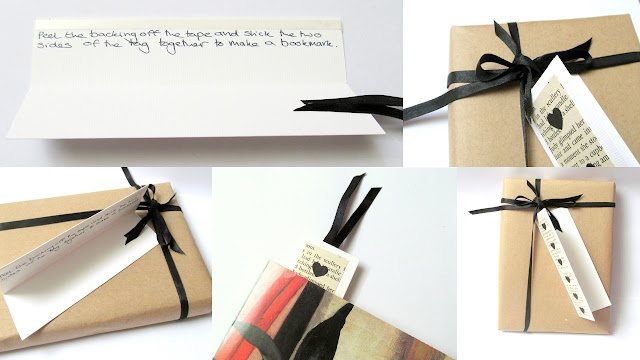
There's someone I know (who shall remain nameless) who when I've given them a gift with one of my handmade tags on it, saves the tag and puts a sticker over the writing on the back so they can reuse it. I do like this idea of reusing and it got me to thinking about what other uses gift tags could have so that they aren't thrown away. That's when I thought about a bookmark gift tag, especially if the present you're wrapping is a book for someone who, like me, thinks no present giving occasion is complete without one!

All I did was cut a piece of white card measuring 80mm x 120mm and scored it in half down the length of the card. I added a strip of old book paper and some punched paper hearts as decoration on the front. Then inside I used double sided sticky tape to stick down two pieces of ribbon at the top so that most of it came out over the top of the card. I then added a strip of double sided sticky tape down the edge of the tag inside the front and added a message to explain how to turn the tag into a bookmark. Use the ribbon on the top to attach the tag to the present.

upcycled bookmark gift tag

How to Make a Paper Bow

To add a finishing touch to a gift, an upcycled paper bow looks great. I used a page from a book to make this one but you can use any kind of paper. The measurements below suited the gift I wanted to put the bow on but they can be adjusted to your needs.

You will need:

  • Scissors
  • 3 strips of paper 250mm long x 15mm wide
  • 3 strips of paper 220mm long x 15mm wide
  • 1 strip of paper 50mm long x 25mm wide
  • Double sided stick tape or glue
Step 1
Take one of the longest pieces of paper and fold it into a figure of 8 shape as below. Use sticky tape or glue to hold the ends in place. 

how to make a paper bow
Take one end and twist it around securing it under the middle of the strip.
how to make an upcycled paper bow
Do the same with the other end, again securing it underneath the middle of the strip.

Step 2
Repeat step 1 with the remaining 2 longest strips.

Step 3
Add double sided sticky tape or glue to the back of 2 of the 'figure of 8's that you've just made where the paper crosses over. Place them one at a time on top of each other spacing them evenly to make a circle.

How to make an upcycled paper bow
The 3 longest pieces of paper stuck together to make the base of the bow.

Step 4
Repeat steps 1-3 with the next 3 longest strips of paper. You should end up with two layers to the bow as in this picture.

How to make an upcycled paper bow
The two layers of the paper bow.

Step 5
Roll the smallest piece of paper into a loop and secure with tape of glue.

Paper bow tutorial
The paper loop which will be the centre of the bow.

Step 6
Use glue or tape to stick the middle layer inside the bottom layer and then the loop inside the middle layer to form the finished bow.

Upcycled paper bow tutorial
The layers are stuck together to complete the bow.

Friday, 16 August 2013

My Favourite UK Crafter of the Week - Book Jewellery by Pretty Little Charms UK

I've got another talented crafter from the UK to share with you this week. This shop is one of the first I saw when I joined Etsy and it was an instant favourite, mainly because it combines two of my favourite things - books and jewellery. I have quite a collection of both and this shop is either going to inspire me to combine the two or start a whole new collection of book jewellery; I haven't quite decided which yet...

As always, these posts are in no way sponsored or influenced, they feature a crafter whose work I genuinely love. The opinions are my own and the quotes are from the crafter. This week's pick is...

Pretty Little Charms UK

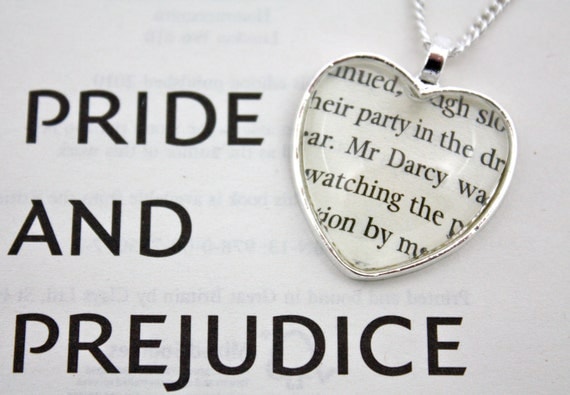
Leigh started making jewellery as a hobby for fun whilst she was studying at university. She studied English and Creative Writing and is a self confessed 'complete book nerd' which is why one day when she saw the library was throwing away an old copy of Pride and Prejudice she had to 'rescue' it. As she says, 'I hate seeing books in a bad way and hate the thought of them ending up in landfills' and although she didn't know what she was going to do with her book, she took it home with her. And then she hit on the idea of combining jewellery making with books and her lovely work was born.

Pride and Prejudice 'Mr Darcy' Heart Necklace
A fittingly heart shaped Necklace made out of the pages from Pride and Prejudice. £11.90 Etsy

The use of books is what first caught my attention. I too studied English and have been known to buy the odd book or two... and never throw them away no matter how tatty they become. I'm often asked why I hold onto them and I think it's because stories are part of being human and are all around us; they help us to make sense of situations, feel emotions we don't normally have a chance to show and explore places and times outside our own experiences. Holding onto them reminds me of this and I think making them into jewellery is a great way to carry these ideas with us.

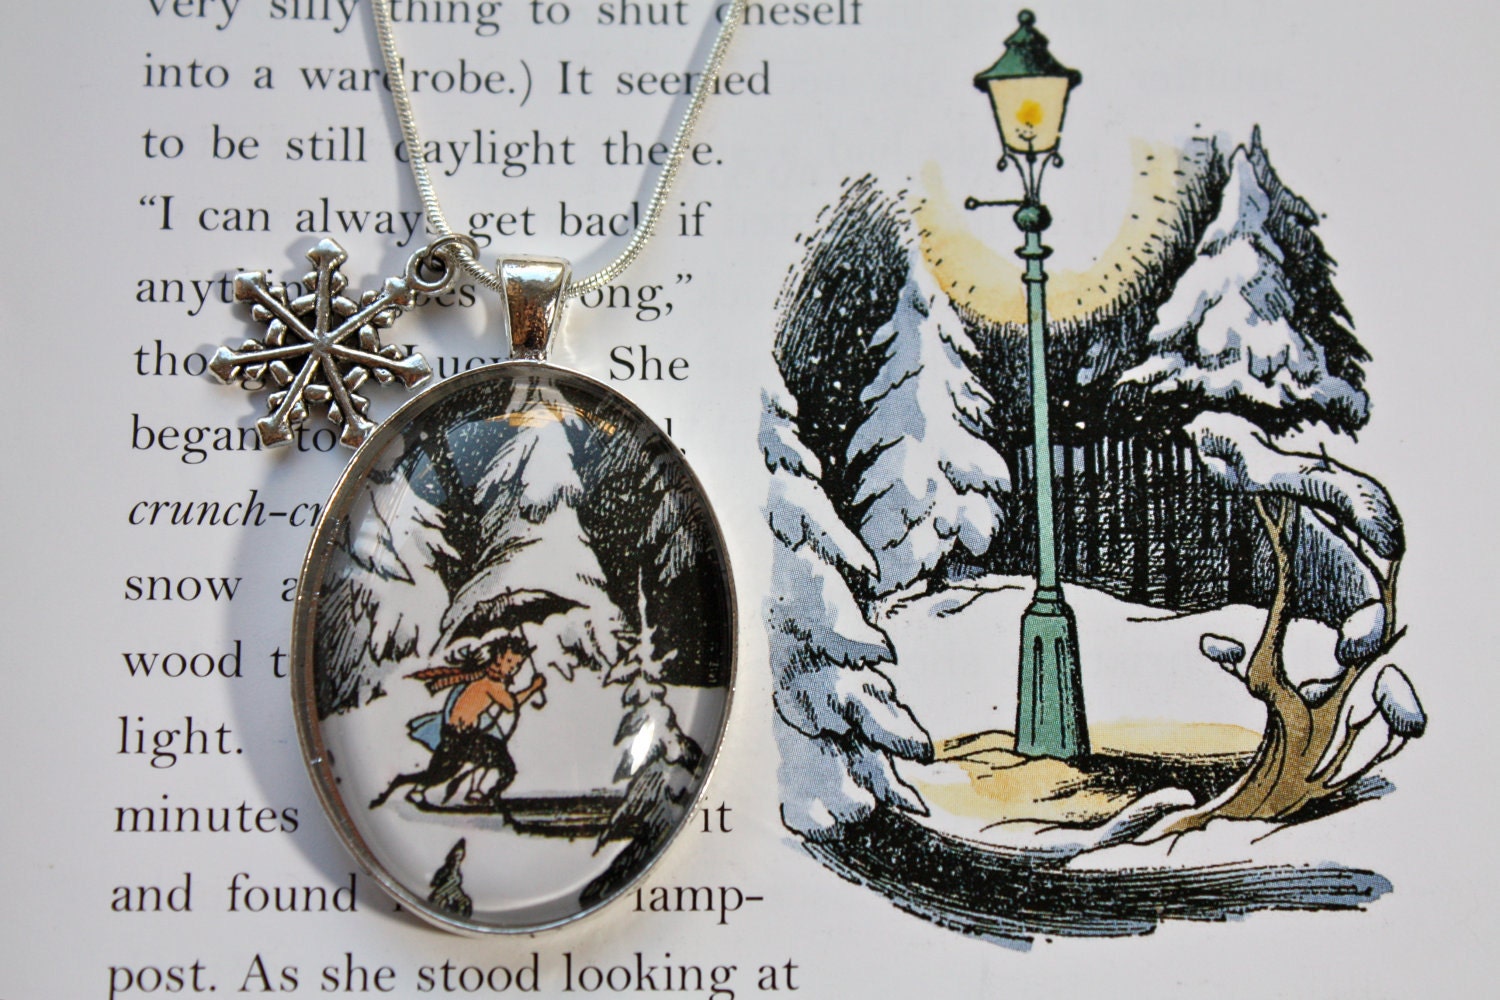
Narnia: 'Lucy & Mr Tumnus' Winter Wonderland Book Page Illustration Necklace
I remember being enchanted by the world of Narnia when I was younger and this necklace brings back those memories. £13.88 Etsy

Another reason I love this jewellery is because it's upcycled, giving a new purpose to objects which are regarded as 'past their best'. This is something I love to do in my crafting too. Although there are lots of lovely new crafting items out there (and I use those too) there are so many beautiful objects waiting to be rediscovered that it makes sense to use these as well to create objects that are unique and help us to be a bit more environmentally friendly. Leigh herself thinks 'the statistics are shocking' when it comes to how many books end up in landfill and shares the idea that re-purposing is the way to go.             

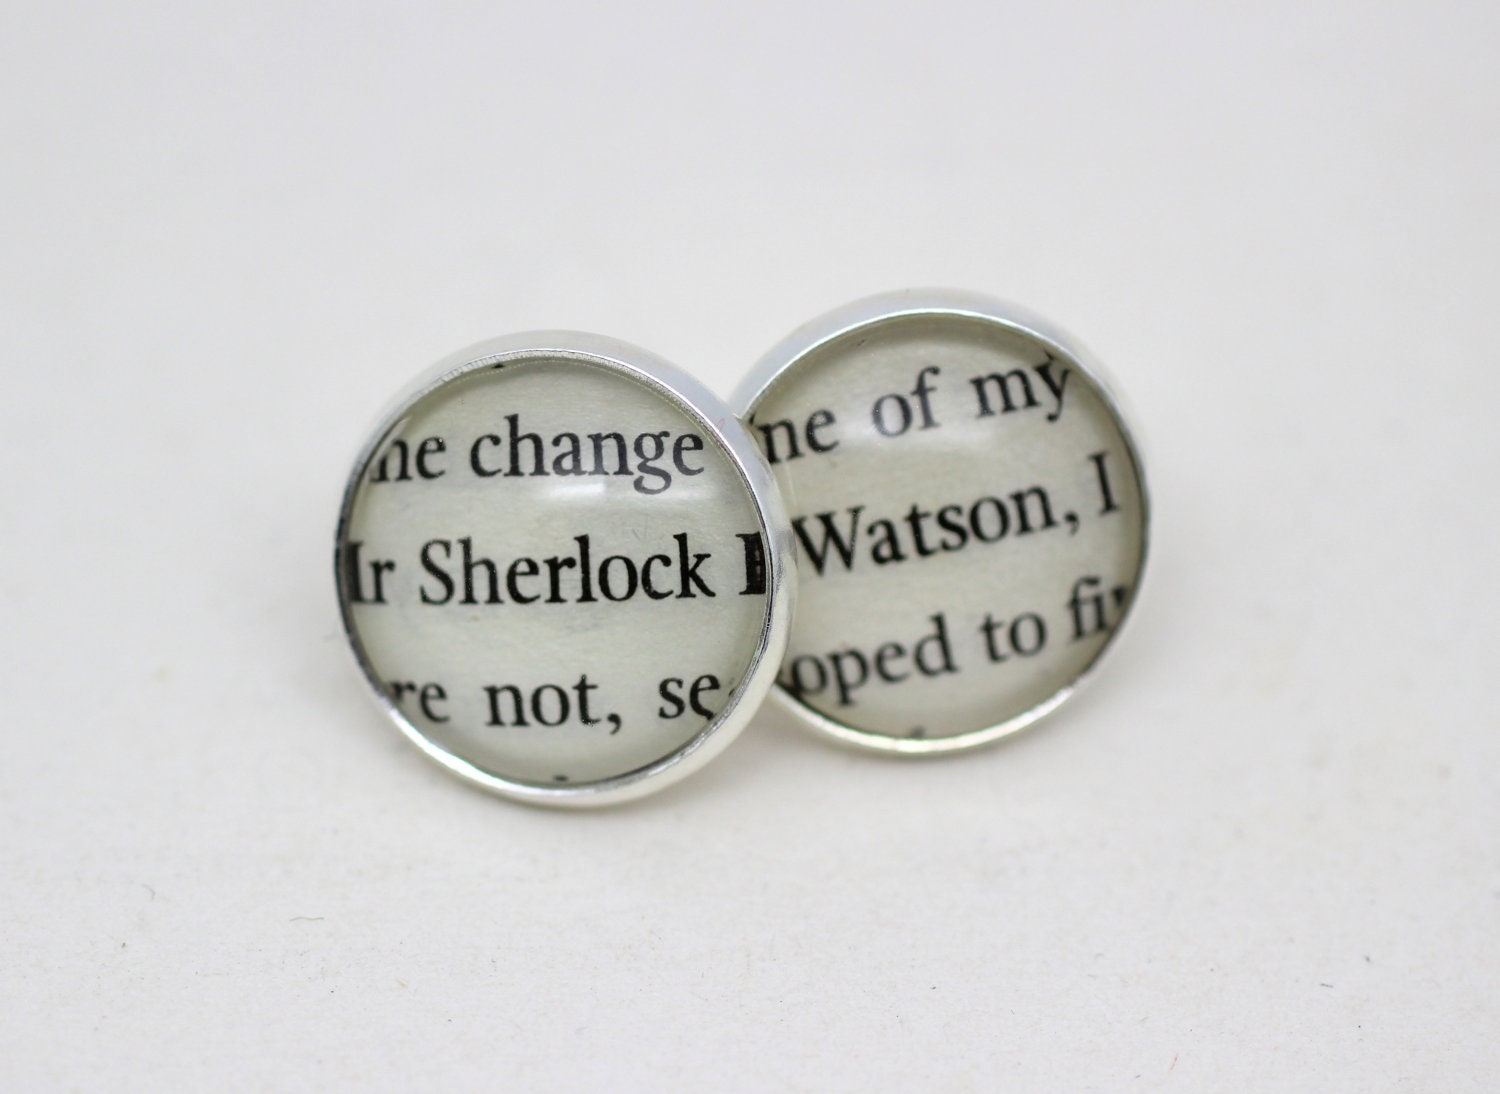
Sherlock Holmes 'Sherlock' & 'Watson' Post / Stud Earrings
Sherlock and Watson earrings clever cut out from a book. £12.56 Etsy

After graduating Leigh moved Spain with her boyfriend who went there for work and used the opportunity to start making more jewellery and open a shop on Etsy. She was 'amazed at the response' and her creations became popular enough to turn her hobby into a full time job. She's since added a range of book based jewellery featuring such books as Alice in Wonderland, Game of Thrones and Lord of the Rings. When she moved back to England she carried on making pieces and she says 'I'm still doing it and still love it!'.

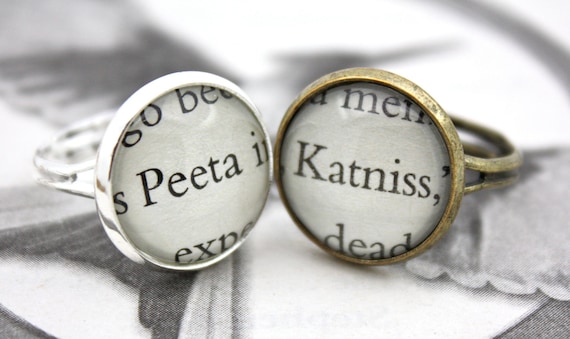
Hunger Games Ring in Silver or Antique Bronze - Lots to choose from
Hunger Games rings are available in silver or antique bronze and come in a wide range of characters' names. £7.93 Etsy

Leigh's now planning for the future of her successful shop and is working on double sided pendants which she will soon be adding to her range. She also plans to 'feature more books over the coming months', so keep a look out as one of your favourites might be appearing in jewellery form!

To see more of Leigh's beautiful jewellery visit her Etsy shop:
Pretty Little Charms UK on Etsy

Thursday, 15 August 2013

Just a quick post...

Just a quick one - I wanted to let everyone know about Our Everyday Harvest who has me as the featured blogger at this week's blog hop! Thank you Kelly.

If you go to join in this week's hop you could be featured next week too!

BlogButton

Wednesday, 14 August 2013

What I Made With My Prize...

I can't resist entering competitions. Over the years I've won a few nice prizes, nothing major but all lovely - especially the hamper of Divine chocolate! A few weeks ago I saw a competition on Facebook from evajeanie and the sewing machiney that was running on their blog and so I entered - and was lucky enough to win (thank you Lindsay)! The prize was a piece of lovely yellow fabric with big white dots and apples; pink and red rickrack; and a card of buttons.
sewing prize
My lovely little prize

Now, I love the idea of sewing and buying lots of gorgeous fabric and buttons, but I'm not very skilled at it. I can do basics and if it involves sewing two pieces of fabric together and adding stuffing I'm fine. My brain and sewing machines never seem to be on the same wavelength so I hand sew items; and patterns puzzle me so I either take things to pieces and try and work out how they're made or play around with paper to make a pattern of my own. And with my prize this is what I did. I tried to think of a few ideas and something I hadn't made before and settled on the idea of a roll to keep my crafting tools in.

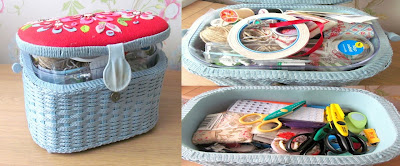
Even though I don't do too much sewing, I have a sewing basket to keep my supplies in. Over time it's become the go to place for keeping any crafting tools and has got a little overcrowded. I'm usually very neat and like everything to have a place, but again when it's linked with sewing my brain goes haywire! That's why I liked the idea of making a place to keep all the tools I'll need for the project I'm working on instead of having to search through my basket all the time.


This very messy sewing basket led to this idea...

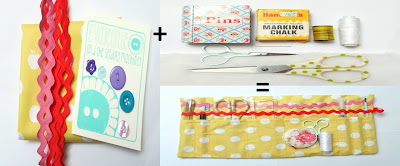
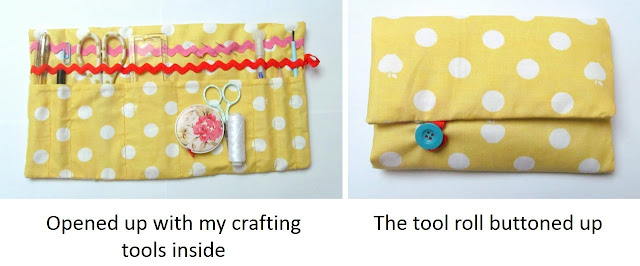
how to make a craft tool roll


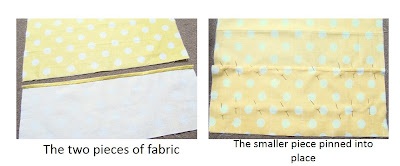
First I cut the yellow fabric into two pieces with one of the pieces being just under a third of the entire length. On this smaller piece I folded along one of the long sides to make a hem and sewed it in place. I then pinned this piece along the bottom of one of the short sides of the bigger piece of fabric and drew some lines with marking chalk for where I wanted the pockets to be.

how to make a craft tool roll

I then sewed along the chalk lines with yellow cotton to secure the pockets in place. I thought about which crafting tools I wanted to keep in it (scissors, pen, pencil, tape measure and so on) and measured the pockets to be able to hold these.


craft tool roll tutorial
The pockets sewn in place with yellow cotton

Next I wanted to use the rickrack. I thought about adding it just as decoration (originally I thought along the top of the pocket section but then realised I should have done that before sewing the pockets in!) but then I thought I should make it useful.  I decided to place a row of each colour above the pockets - one to help hold longer items in place and one as a place to keep smaller accessories such as paper clips and pins. I pinned the rickrack in place and sewed it just in a few places above the sewn lines of the pockets so tools could go behind it.

I then placed the two right sides of the fabric together and sewed down the two shorter sides. I added a small loop of the red rickrack to one side to use for the fastening on the front before I sewed the right hand side. After this I turned the fabric the right way around again and inserted a piece of thin wadding into the 'pocket' and sewed along the bottom edge turning the two raw edges in first to give a neat finish. I finished the tool roll by adding a button to where the rickrack loop reached when the roll was folded over.

craft tool roll sewing project

I was really pleased with the results, especially as I don't class myself as a 'proper' sewer. It might not be the most advanced project, but it was an achievement for me! And I get to have a neat sewing basket again thanks to the lovely prize that Lindsay sent me.

Tuesday, 13 August 2013

Packaging That Tells a Story

I've been crafting for years but only decided to make it into a small business in May. As I've only been going for 3 months I'm still finding my feet and trying out new things. One of these is packaging now that I'm getting in touch with shops to discuss selling my work. As I'm just starting (and have spent more than I've earnt setting it up!) I'm trying to make packaging myself to start with and thought I'd share what I've come up with for my upcycled cards, tags and jewellery.

First of all I asked the very talented Viktorija at And Smile to draw me a flamingo to use as a logo. I love her work so was happy when she agreed to take on the commission and was very excited on Saturday to receive this lovely bird to use!

Then I needed to create some stickers and tags for my products. I wanted to have something that was simple, protected my cards, let people know about the products and didn't use too much packaging. I chose stickers for the cellophane bags I use to protect my cards, tags for jewellery and bag toppers for tags and stickers.

I decided on a simple sticker for the front of the cellophane bag and label letting people know it was upcycled. One the reverse I wanted to add more details about how the item is handcrafted and unique.  When I describe my products on Etsy I include information about where I got the materials from, but there's not enough room on the packs. I love upcycling because each piece has a history and when I buy upcycled I like to know this. So I decided on the back of the packet to include a reference and my email address so people can get in touch if they'd like to know too.


For my bracelets and necklaces I made some kraft card labels to go with the upcycled theme and added the same stickers as the cards to the front and back.  For the earrings I made a little card with the information on the back and a strip of paper to match the paper beads on the front. Again, there's a reference to get in touch if someone wants to know their history.

So hopefully I'll be able to share the stories of my products for all those who want to know!

Sunday, 11 August 2013

Inspirations for Clear Stamps

I'll admit it. I have a rather large collection of clear stamps. I've been accumulating them for a few years and can't even remember where I got some of them from (I think I go into a trance in craft shops sometimes). I love playing around and creating different images and effects to amuse myself, or even to use in some crafting work! So I thought it would be good to share my stamping experience with you showing you how to use them if you haven't before, and some (hopefully) new ideas if you have.

The Basics

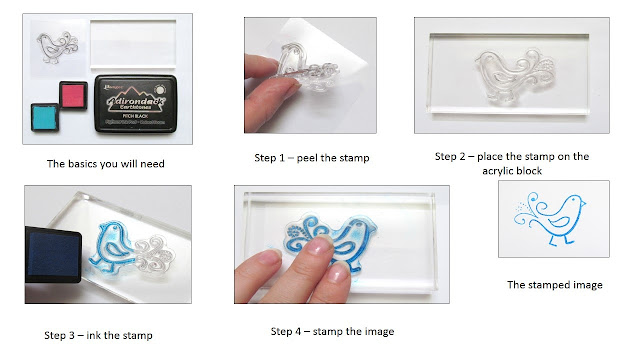
Clear stamps come on sheets of (usually) clear plastic which they are 'clung' to with the flat side of the stamp on the sheet. If you are going to use them you will need an acrylic block to stick the stamps to so they are easy to use and stamp an even image. You will also need an ink pad (or if you're like me one for every colour you know exists).

How to use them 

how to use clear stamps


1. Peel a stamp from the sheet. If you're peeling one off a new sheet it's usually fairly well stuck so you might need to pull a bit.  The stamps do stretch but be careful not to pull too hard as they can also snap.

2. Put the flat side of the stamp onto the acrylic block.  It will 'cling' in place.

3. Now you need to ink the stamp.  Always take the ink pad and tap it on the stamp.  If you press the stamp onto the ink pad it 'floods' with ink and will make a messy image.  Tap the pad onto the stamp enough to cover the stamp but not to 'flood' it.

4.  a .You're ready to stamp the image. A great advantage of clear stamps is that you can see where you're going to stamp so use this to make sure you have the stamp straight.

b. Press the inked up side onto whatever paper you want the image stamped on, press firmly enough so the ink will transfer but not too hard as it will squash the stamp and blur the image. Make sure you use even pressure across the stamp.

And there you have it! A stamped image! (Don't worry if it's uneven or smudged, just have another go - I don't always get a clean image.)

Playing With Stamps

Restamping

This is where you stamp the same image again without re-inking the stamp in between.  The second image will be fainter and so on depending how many times you can re-stamp. This is a good technique for building patterns or depth.

stamping technique


Using part of the stamp

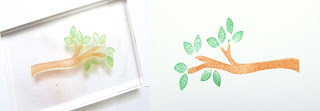
This is good if there's only a part of the image on the stamp that you want to use.  There are two ways to do it.  The first is just use the corner of your ink pad to pick out the parts of the image you want to stamp - you might go over where you want the ink to go (I know I do) but you can use a tissue or baby wipe to clean up any errant ink. This is good if you want to use two different colours too, like in the picture below.

The second way sounds drastic - you cut the stamp up.  This means you will only get ink where you want it and the two parts of the stamp can go back together by being 'clung' next to each other on the acrylic block.

two colour stamping


Glitter stamping

One of my favourites! You will need a sponge and some liquid glue for this.  After you've clung you stamp onto the block, put some glue on the sponge and use this like you would your ink pad.  Stamp the image and then sprinkle with glitter.  If you're using a fine stamp make sure to use fine glitter. Tap the paper to remove the unstuck glitter and you have a lovely sparkly image.

glitter stamping


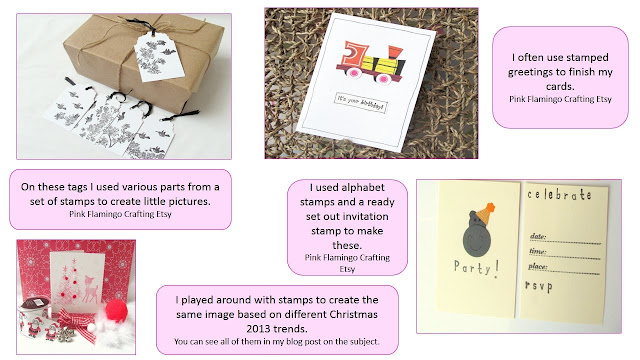
How I've used stamping in my work

examples of stamping


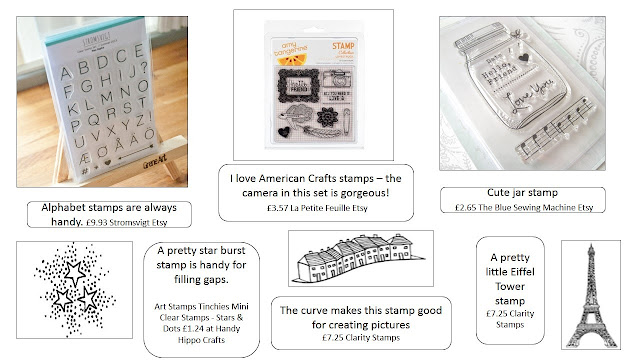
Lovely stamps to buy

clear stamps to buy


I hope this gives you some ideas to try and to enjoy.  Happy stamping!

(And don't forget, I love to see other people's work so feel free to share any stamping pictures.)