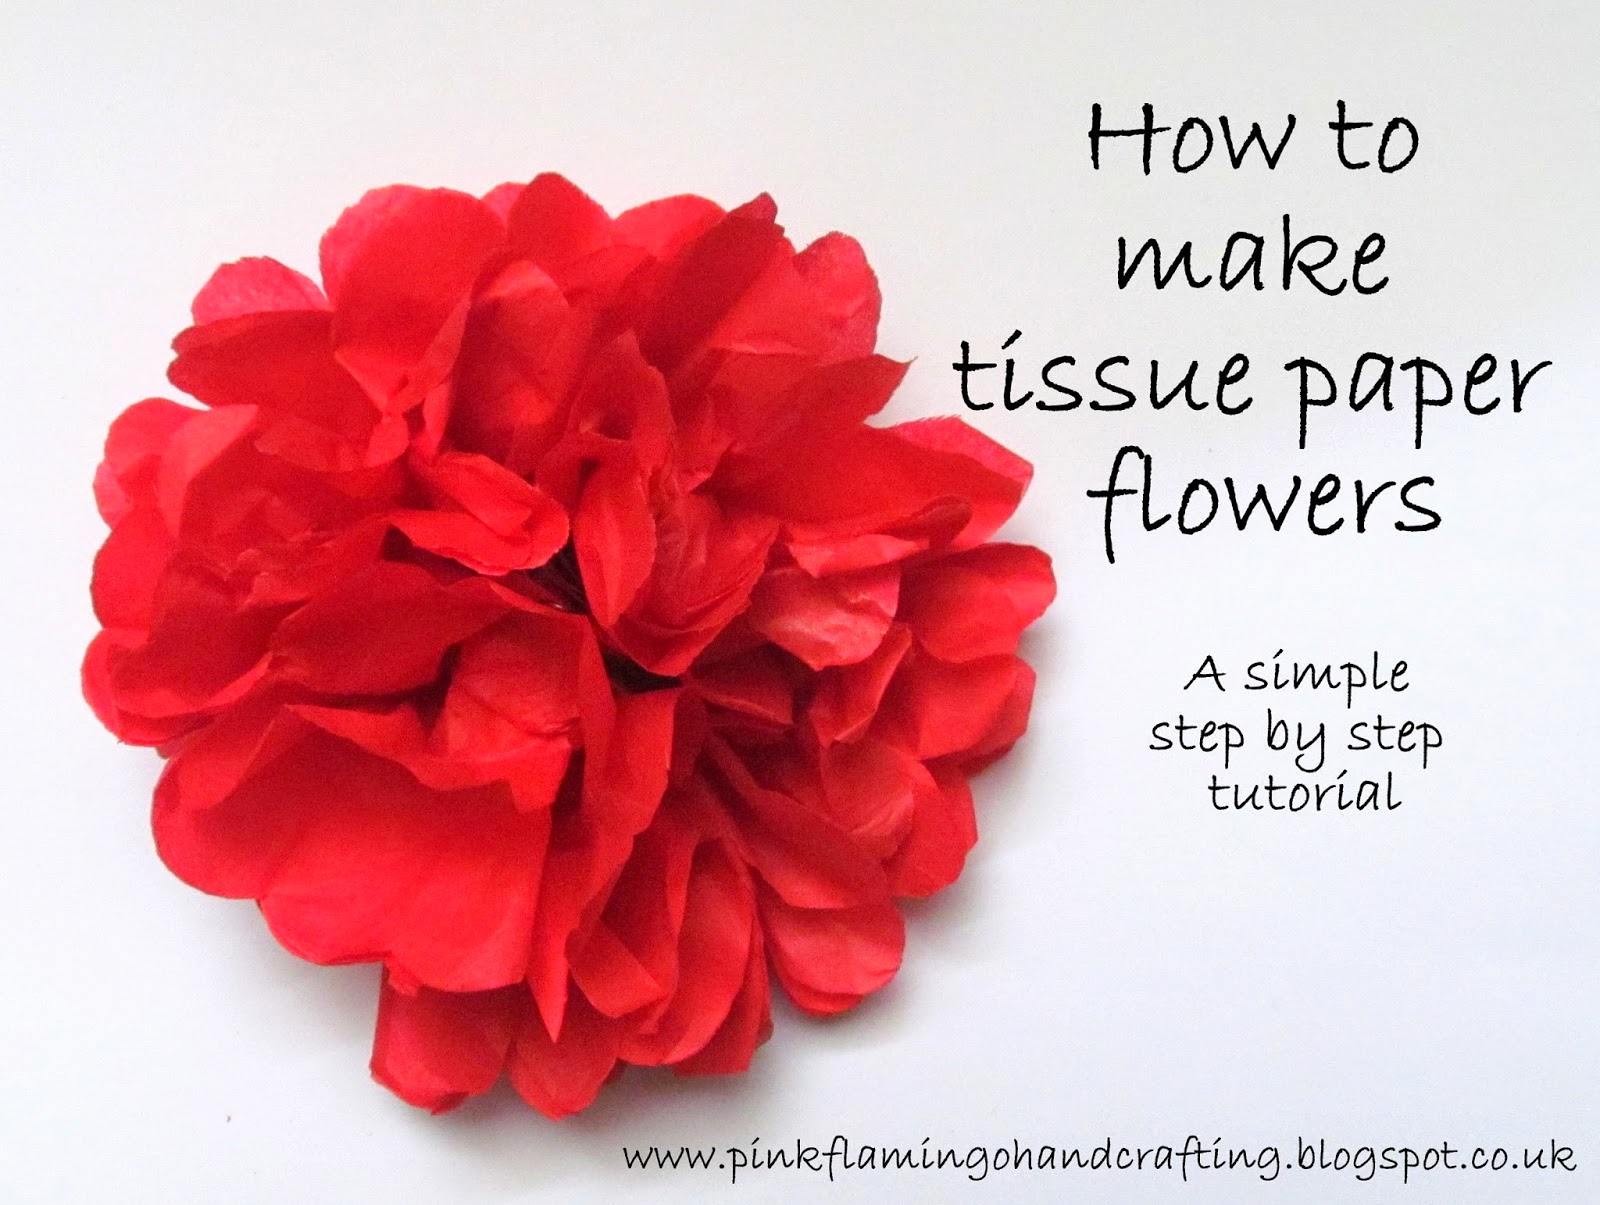
I started to cut it up to take images for card making and to add pieces to ephemera craft packs when I found a lovely page showing you how to make tissue paper flowers. So I thought I'd give it a go and turn it into a tutorial for here!
This is the original tutorial from the book...
 |
| Taken from 'Jinty Annual 1985' |
It's a very simple process. All you will need are:
- tissue paper
- a paper clip or pipecleaner
- scissors
Step 1
Cut the tissue paper to the size you want. On the page (and in this tutorial) 6 sheets of tissue paper are used which are 6 x 9 inches each. This has made a final flower that has a diameter of 5 inches.Step 2
Place the tissue paper flat in front of you then start to concertina the paper from one of the shorter ends folding it back and forth (like folding a paper fan).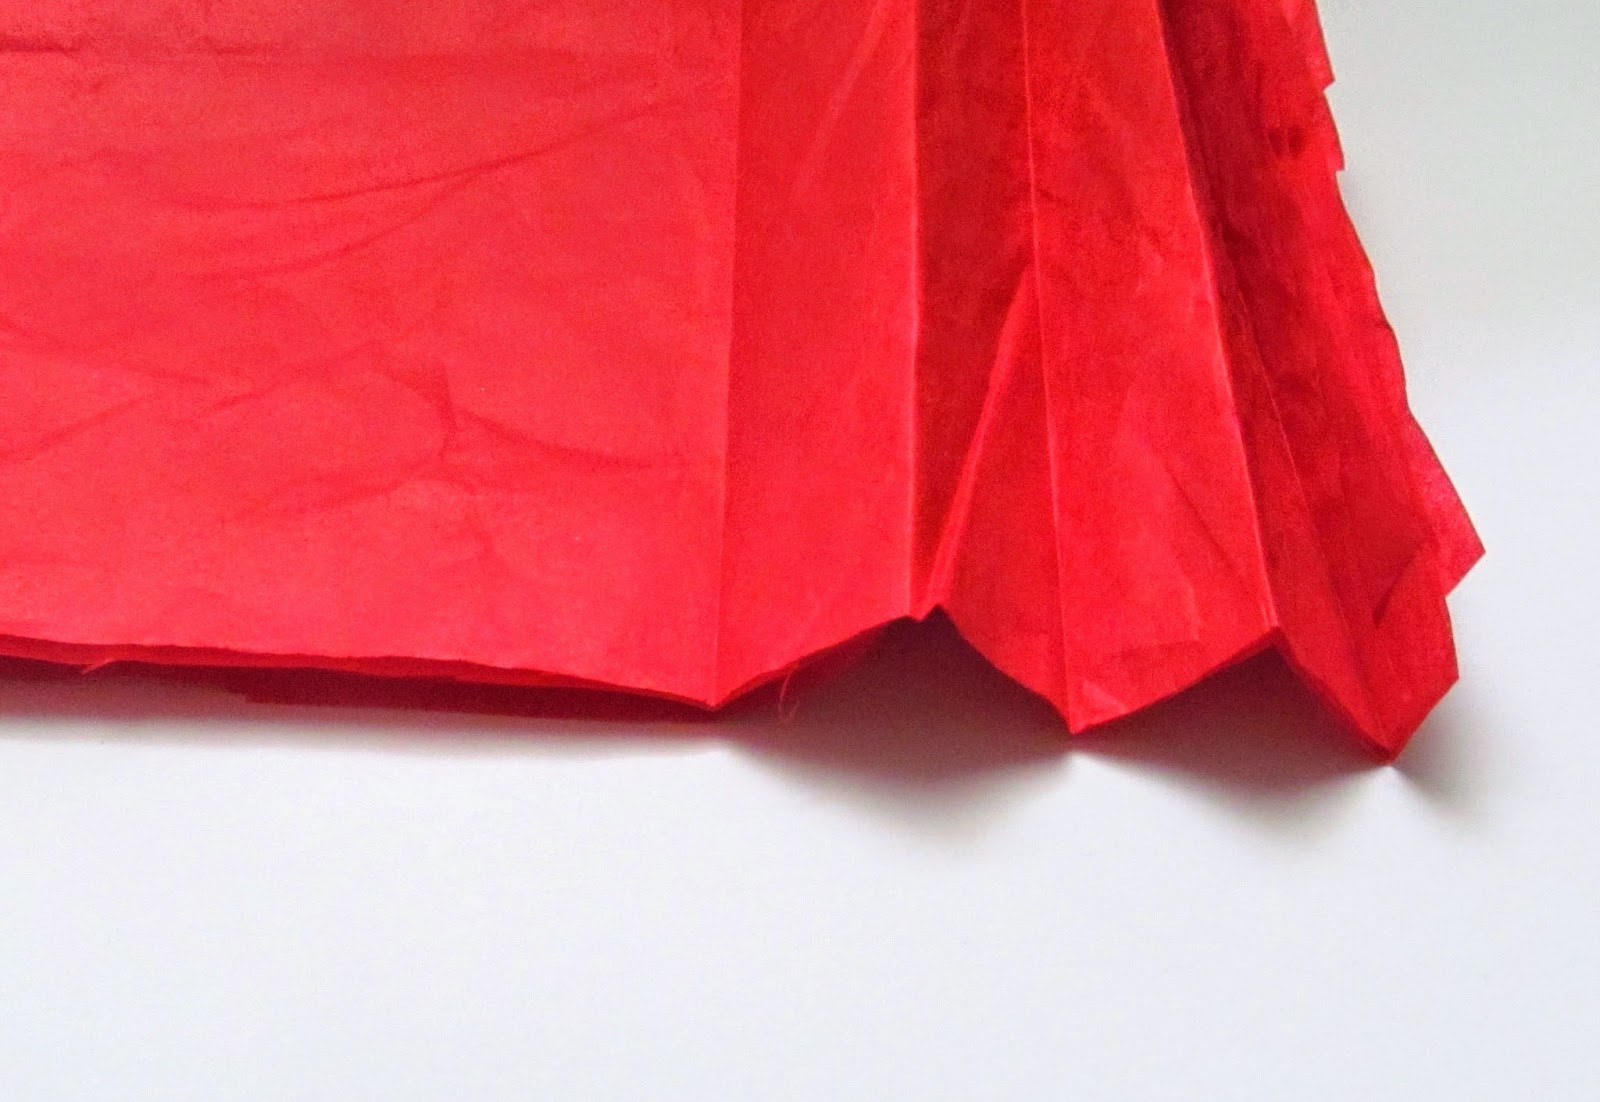
Step 3
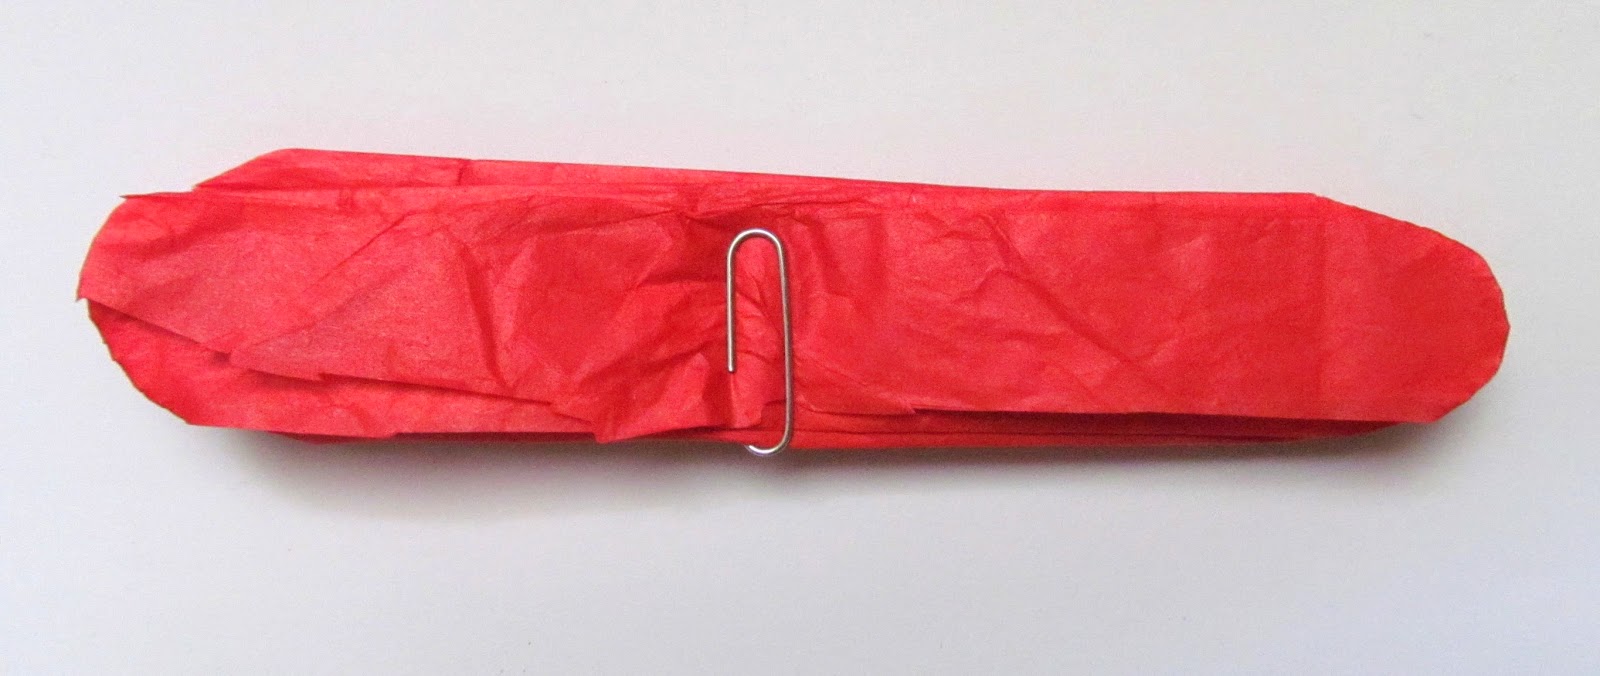
In the original tutorial you use a pipe cleaner for this step to form a stem but I've used a paper clip as I wanted a flat back. Whichever you're using, place it in the middle of the folded paper to secure it..JPG)
Step 4
Now cut the ends of each side of the folded paper to create the shape of the petals.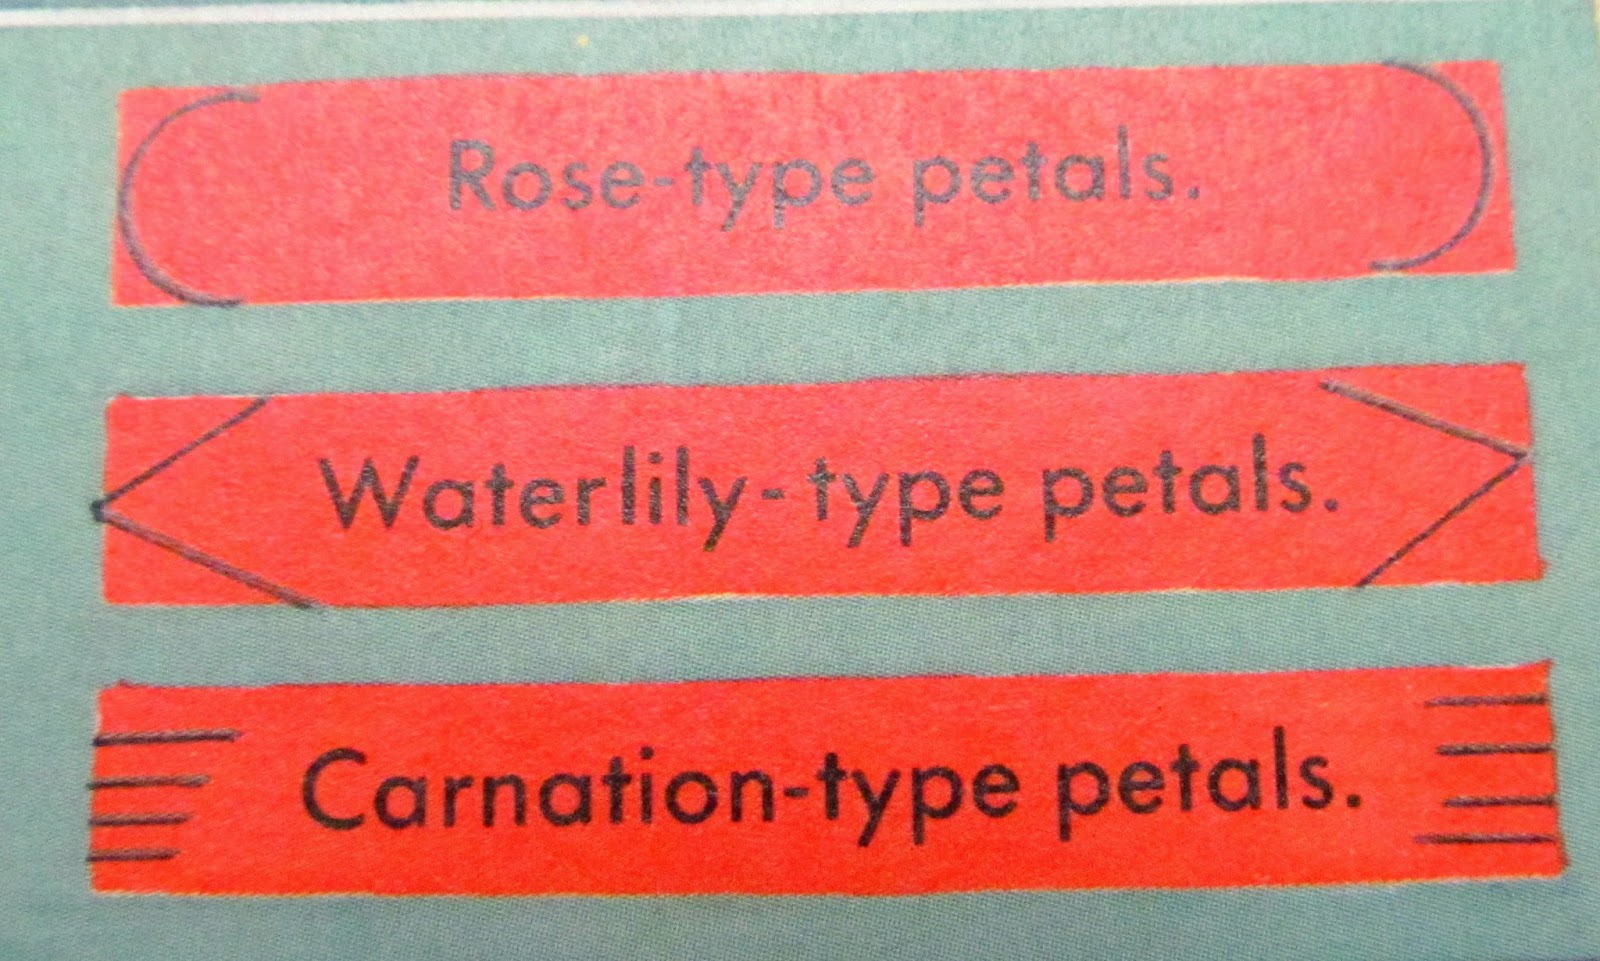
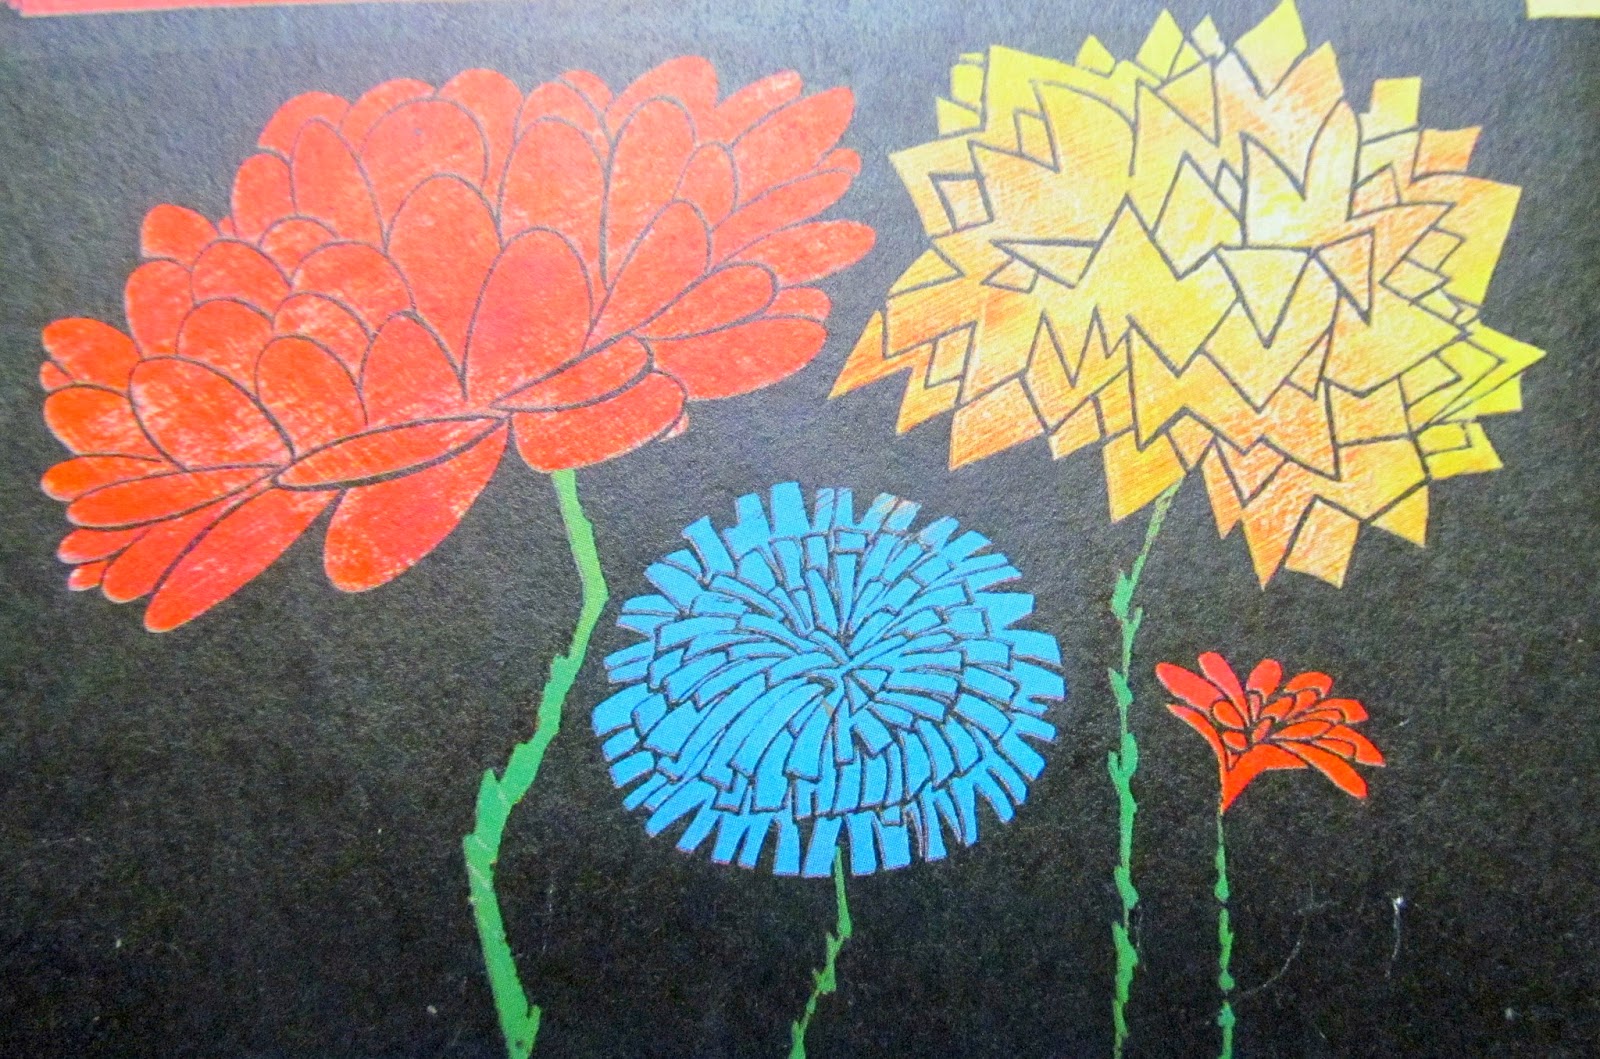 |
I wanted to make a rose style flower (like the big red one in the picture) so I cut the ends to be rounded.
Step 5
Now spread out the petals to form a circle turning the edges of the paper up to help it keep its shape.
Step 6
Next carefully pull up each layer of tissue to create the layers of petals.
And then you'll have your finished flower!

I'll be using these to decorate all kinds of things. I think they'll look great instead of a bow on wrapped gifts or as table decorations. I'm going to make some smaller yellow ones for Easter decorations too!
It's great to have a step-by-step tutorial to show one how to put these together! Last year we tried is ourselves but it would have been nice to have a tutorial to show you exactly how to do it. Thanks so much for sharing it on #simplybebetsy.... Sharon and Denise
ReplyDeleteThank you very much for writing such an interesting article on this topic. This has really made me think and I hope to read more. facial tissue machine
ReplyDelete