Showing posts with label recipe. Show all posts

Monday, 9 September 2013

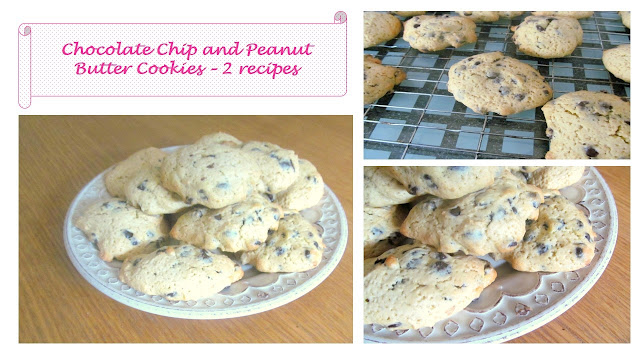
Chocolate and Peanut Butter Cookies - 2 Recipes

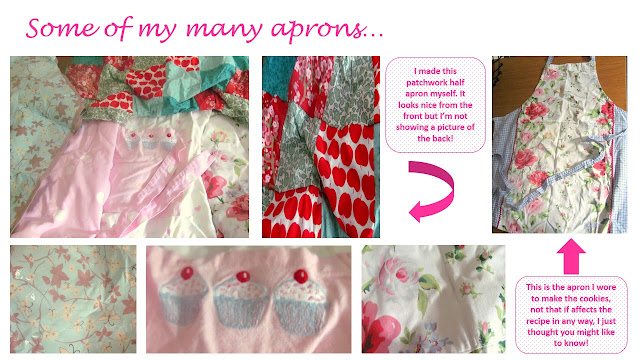
If you read my blog on Saturday you will have seen the beautiful retro inspired aprons by Rosie Ann. Writing and looking at that post got me in the baking mood - and was a great excuse to choose one of my many aprons to wear! My first thought was the best combination ever - chocolate and peanut butter.


A selection of aprons


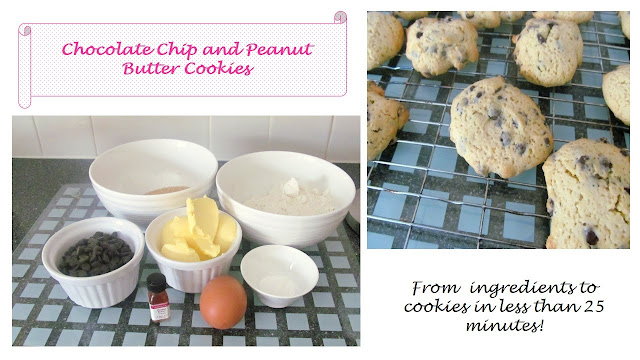
I have a recipe I usually use to make chocolate chip and peanut butter cookies I got from an American cookbook. It says to use peanut butter chips (which I'd never heard of!) so I substituted them for chocolate chips - and the result is heavenly! I got a craving for them over the weekend so thought I'd treat myself to some and got all ready to bake them - then discovered I didn't have any peanut butter. However, I did have some peanut butter flavouring I bought from Make or Bake's stall at a farmer's market I attended last month so thought I'd try a chocolate chip cookie recipe with this flavouring. Below are both recipes (if you need an excuse to try both!); the pictures are from the recipe with peanut butter flavouring.


chocolate chip and peanut butter cookies recipe


Chocolate chip cookies with peanut butter flavouring

Ingredients

75g butter (I use butter substitute)
75g brown sugar
1 egg
A few drops of peanut butter flavouring oil
150g plain flour
Pinch of salt
3/4 tsp baking powder
100g chocolate chips (I prefer dark chocolate)

peanut butter flavouring
The peanut butter flavouring I tried in my recipe


1. Heat the oven to 160 C / 350 F. Mix together the butter and sugar until they are creamy.

2. Beat in the egg. Add the peanut butter oil - I used 5 drops which gave a subtle flavour but add more if you like it more peanutty.

3. Mix together the flour, salt and baking powder. Add this in 3 stages to the butter mixture stirring in well each time.

4. Stir in the chocolate chips.

chocolate and peanut butter recipe


5. Put spoonfuls of the mixture onto a baking tray lined with greaseproof paper. I stretched my mixture to 11 cookies. Leave space in between each cookie for them to spread.

peanut butter and chocolate cookie recipe


6. Bake in the oven for 10 - 15 minutes until they start going golden brown but are still soft. They will firm up as the cool.

7. When they are a little firmer transfer them from the tray to a cooling rack to cool completely.


Chocolate chip and peanut butter cookies recipe

Tip - to make them extra chocolatey substitute 40g of the plain flour for cocoa or drinking chocolate!

Chocolate and peanut butter cookies

These are the cookies I usually make when I haven't run out of peanut butter.

Ingredients

1/2 cup of plain flour
1/2 teaspoon of baking powder
A pinch of salt
1/4 cup of butter (I always use butter substitute rather than the real thing and it always tastes good)
1/2 cup of peanut butter (I prefer chunky)
3/4 cup of brown sugar
1/2 an egg
A little milk (if needed)
1/2 cup chocolate chips

1. Heat the oven to 160C/350F.

2. Mix together the flour, baking powder and salt in a bowl.

3. In another bowl mix the butter, peanut butter and brown sugar. I use an electric whisk or you can do it by  hand.

4.  Add the egg and beat it into the mixture.

5. Pour the flour mixture into the peanut butter mixture and mix until combined. If the mix is too stiff at this point add a little milk. The mixture should be firm but sticky.

6. Stir in the chocolate chips.

7. Line a baking tray with grease proof paper. Drop tablespoons of the mixture onto the tray and flatten it a little. Leave space between each drop of mixture because the cookies will spread as they cook.

8. Bake for 10 - 15 minutes. They should look brown and starting to set. Take them out of the oven while they are still squidgy though as they will firm up as they cool.

9. Let them cool on the tray until they are firm enough to be picked up and then put them on a cooling rack to cool completely (or if you're like me eat a couple while they're still warm and melting!).
Wednesday, 28 August 2013

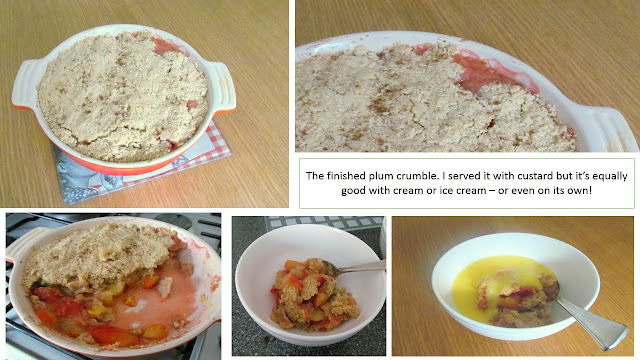
Plum Crumble - Seasonal Recipe

When I was little the August Bank Holiday (that's just been on Monday) seemed to mark the end of summer. It was usually the weekend we'd come back from the family holiday and it was only a few days until the start of the new school year. Although it was sad that summer was over, it also meant that autumn was on its way with lots of treats of its own! One of my favourites was (and still is) fruit crumbles. In our back garden we had an apple tree that was starting to fruit and meant lots of lovely tasty treats, but it was a little unreliable and only seemed to share its apples every other year! However, we also had a plum tree which fruited every year and made lovely crumbles of its own.

While out shopping yesterday I spotted some juicy orangy-red plums which are right in the middle of their best season here in the UK. Well, that meant only one thing on my mind - plum crumble! So last night I made one for dessert and here I share the recipe with you.

plums

Plum Crumble Recipe

You will need:
  • 6 large plums
  • 175g plain flour
  • 1tsp baking powder
  • 90g butter
  • 90g brown sugar   
  • Optional - cinnamon, nutmeg, crushed nuts or oats for the topping
  • A baking dish (I used one that was 20cm round)
Serves 4-6 people (depending on how greedy you are! I divided mine into 4 generous portions -because I am greedy...)

Step 1
Turn the oven on and set it to 170C/ 350F. Let it heat up while you prepare the crumble.

Step2
Wash and slice the plums. Arrange them in the bottom of the dish.

Plum crumble recipe

Step 3
In a bowl mix together the flour and baking powder. Add pieces of butter and rub it into the flour with your finger tips until it sticks together and looks like crumbs.

Crumble topping recipe

Step 4
Use a fork to mix the brown sugar into the flour and butter mixture.

Step 5
Now tip the flour mixture over the top of the fruit in the dish. Pat it down so the mixture covers all the fruit and goes up to the sides of the dish. (The fruit will bubble up as it cooks so this helps to seal it in).

If you want to add any additional toppings, now's the time. I sprinkled mine with a little nutmeg. Cinnamon, crushed nuts and oats also go well either on their own or all mixed together. 

How to make plum crumble

Step 6
Put the crumble into the pre-heated oven and bake for 40 minutes until the top is light golden brown and the fruit is starting to bubble through. If the topping looks like it's getting too brown, cover the dish with foil until the fruit is cooked.

Plum crumble recipe

This recipe can be made with any soft fruit you have. Some of my favourites are apple, blackberries or rhubarb.

Thursday, 1 August 2013

It's Yorkshire Day!

The 1st of August is officially Yorkshire Day and as someone born and bred here (Sheffield to be exact) I thought I'd celebrate. It originated in 1975 and continues to this day marking all things to do with the UK's largest county.
Yorkshire rose.svg
The white rose of Yorkshire
                                                      
Sheffield city centre - taken by my friend Marion using her fancier than mine camera!

My Yorkshire Pudding Recipe

Yorkshire pudding is one of the first recipes I remember making.  We ate it quite regularly and it's quite easy to make so I think this is why I was trusted with it when I was little! I've tried different variations over the years and this is a mixture of elements of these that never fails to rise. 

Ingredients - Makes 1 big or 8 small puddings
2 eggs
180ml milk
salt and pepper
20ml oil (sunflower, vegetable or olive)
125g plain flour
30ml really cold water
Baking dish approx 20cm square or a muffin tin

Method
1. Pre-heat the oven to 230C (440F).

2. Break the eggs into a bowl, add the milk and whisk until they start to go frothy.  Add some salt and pepper to taste.  Leave the mixture to stand while the oven heats up.

3. Add about 1/2 teaspoon (2.5ml) of oil into 8 of the holes in the muffin tin or into the baking dish. Put this into the oven to heat up while waiting for the egg and milk mixture.

4. Next add the flour to the egg and milk mixture and stir until well mixed.  It should be of a consistency that when you dribble some of the mixture from a spoon into the bowl the pattern you make stays for a few seconds on top of the rest of the mixture.  If it's too thick add a little more milk.

5. Add a bit of really cold water, about 3 tablespoons (30ml). This is a trick my mum swears makes it rise!

6. Carefully remove the baking dish or muffin tin from the oven.  Pour the mixture into the dish or divide the mixture between the 8 holes with oil in them.

7. Put the dish/tin back in the oven and cook for 20-25 minutes until they have risen and are golden brown.

Etsy Yorkshire Team Favourites

I'm a member of the Etsy Yorkshire team on Etsy.com and these are some of my favourite items made by other members. We're very talented here in Yorkshire!

Ice-cream Cone Earrings
Ice cream earrings by Cute And Quirky Girl - cute and quirky indeed!


Owlways and forever
Owl print by Peanut n Jellybean - just adorable!
Decorative Throw Pillows Cushions Pair, Green Birds Linen Handmade in UK
Throw cushions by While Loki Dreams - I love the colours and the bird pattern.
Rosie the red teddy bear with cute neck scarf
Mohair teddy bear by Strawberry Kitten - a stunning little bear.
Jaffa Cake Brooch
Felt Jaffa Cake brooch by The Ladybird Tree - I can't resist a Jaffa Cake!
                                                                                        

Yorkshire photos taken by Marion (with her fancy camera...) 

The very picturesque Robin Hood's Bay in North Yorkshire

Yorkshire is known as the greenest county and Sheffield the greenest city.  This view from High Bradfield shows why.
Inside Kelham Island Museum which shows Sheffield's industrial past. 

Historical buildings on The Shambles in the centre of York. Some of these date back to the 14th century.