Showing posts with label tutorial. Show all posts

Thursday, 1 May 2014

5 Upcycling Tutorials Using Various Materials

As my mum keeps telling me, 'upcycling' has been around for years (even though 'back then we didn't call it upcycling, it was just something we had to do', usually followed by how lucky me and brother were when we were children!). Now though the emphasis is on creativity as well as necessity and there are lots of great ideas out there about how to upcycle.

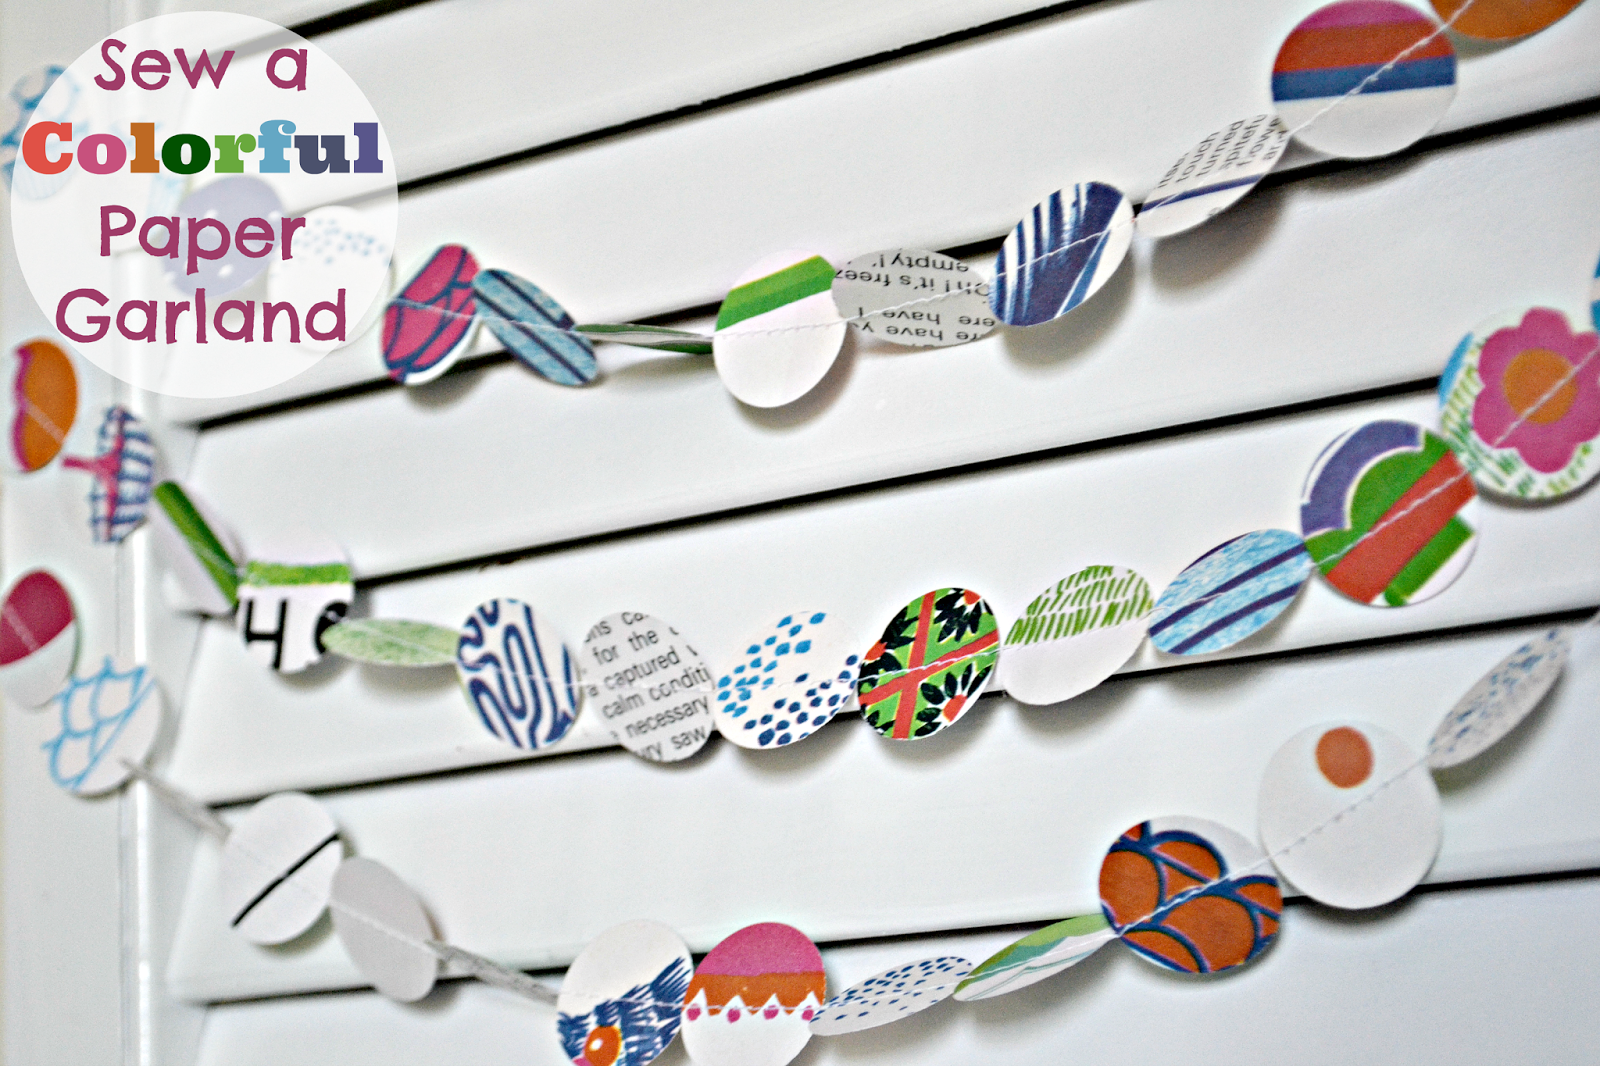
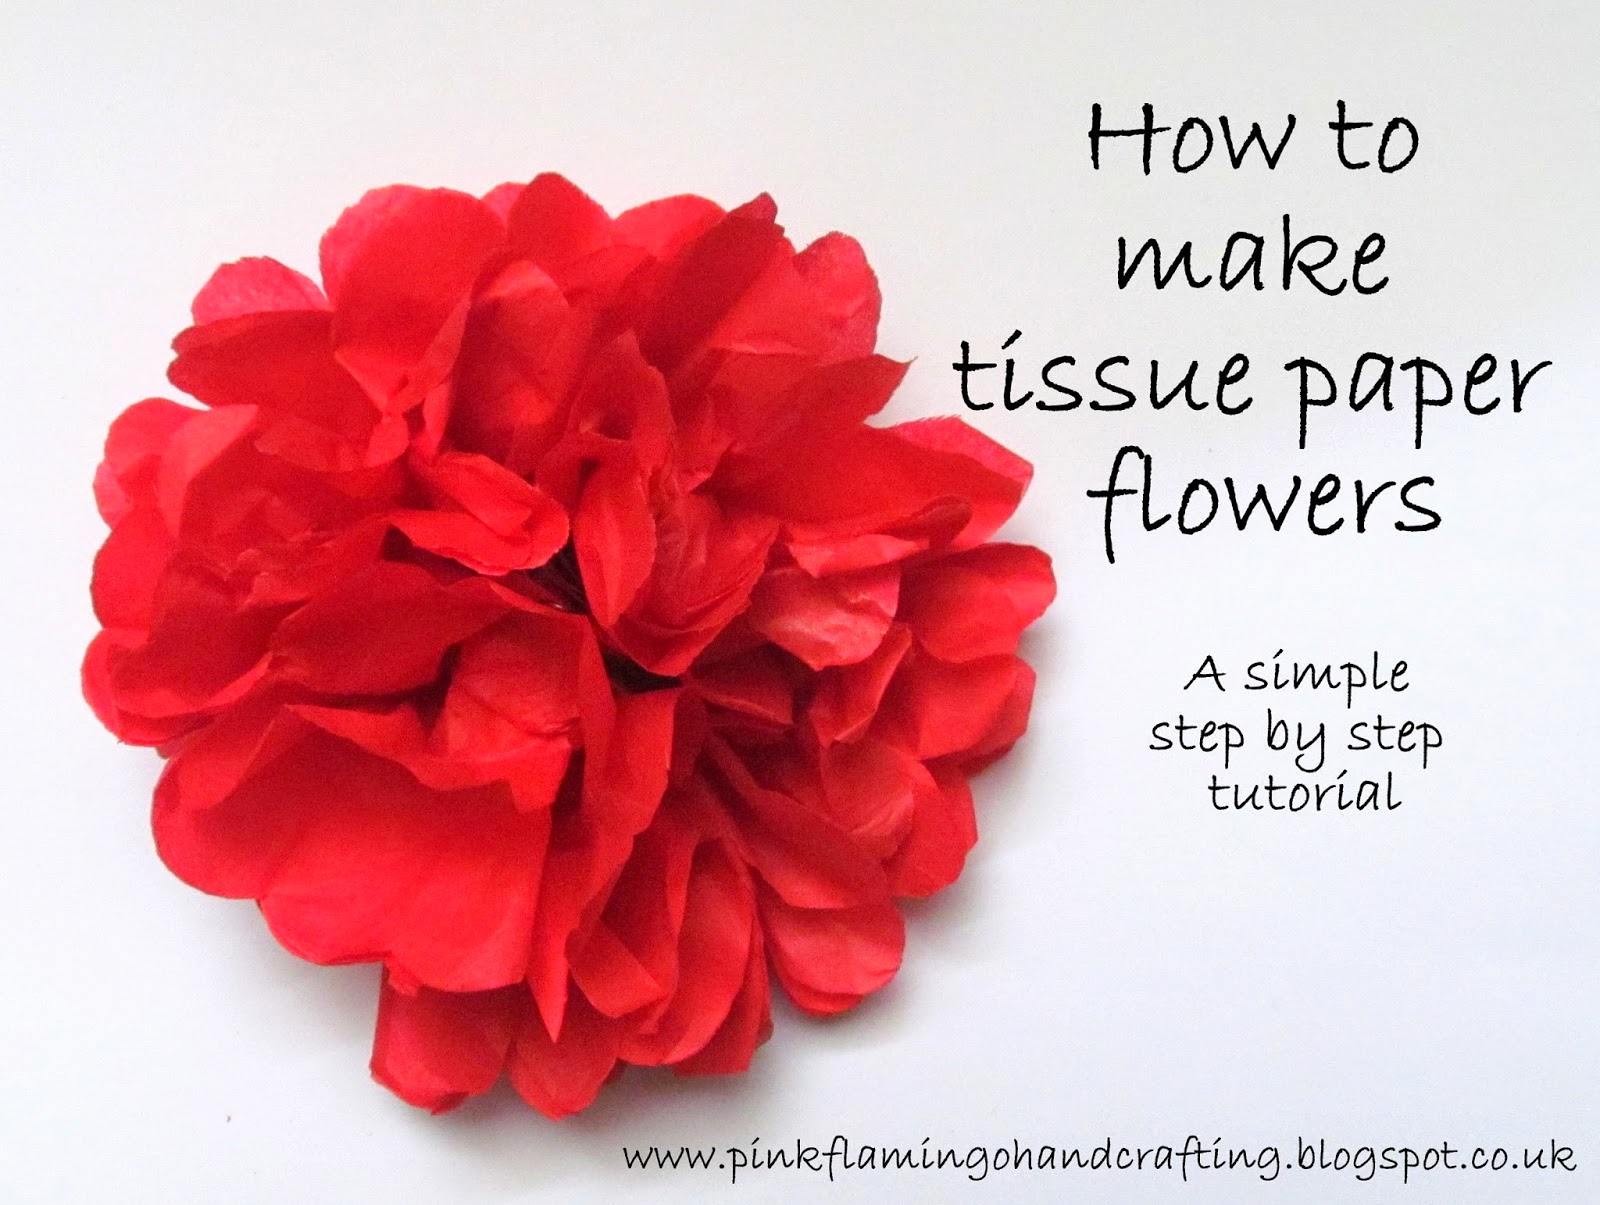
Paper is my favourite material to work with, but here are some other wonderful ways to re-use and upcycle...

Pencils

This tutorial from Design Mom shows you how to create this fun and colourful jewellery from old pencils. Perfect for using up those last bits of pencil crayons that are too short to get in the pencil sharpener! 
 
http://www.designmom.com/2011/08/diy-colored-pencil-jewelry/


Tin Cans

There are always plenty of tin cans around, but instead of putting them in the recycling bin what about making a colourful bird feeder for your garden? This tutorial can be found at We Made That.
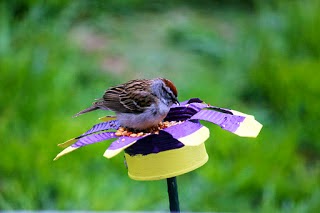
http://we-made-that.com/tin-can-flowers/


Zips

A fashionable idea for when a zip on a garment breaks - turn it into a ring! Useful DIY shows you how.

http://www.usefuldiy.com/es/diy-zipper-ring/

Toy Animals

A very clever (and fun way) to use toy plastic animals from Thinking Closet. One they've finished been played with you can turn them into place card holders. They could also be used as note or photo holders too. I'd try to match the animal to the guest!

http://www.thinkingcloset.com/2013/08/13/animal-place-card-holder-tutorial/#comment-22816
  

Glass Jars

There are lots of great ideas around for using old Mason jars but I particularly love this one from All Things Heart and Home. Here a string of LED lights are used to make a chandelier effect.

http://www.allthingsheartandhome.com/2013/07/15/diy-mason-jar-light/

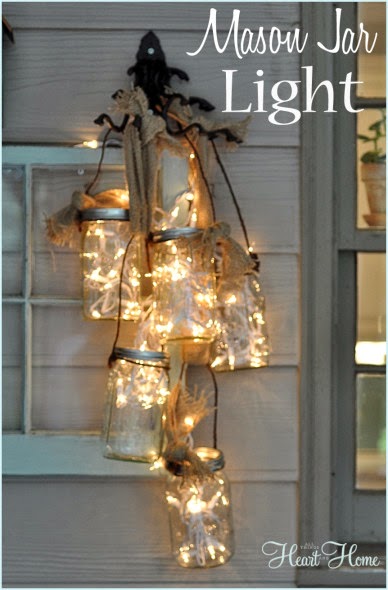
Now I've got my inspirations I'm off to rummage through some things that would be otherwise thrown away and get making!

Tuesday, 15 April 2014

Crafty Ideas from the Life of Jennifer Dawn

Blogs are fantastic ways to share ideas, know how and information. I love sharing my ideas and posts at link parties (take a look at these) and taking a look at all the other creative makes, tutorials and inspirations you can find there.

I sent Jennifer at The Life of Jennifer Dawn some of my ephemera packs to get creative with - and she's come up with some amazing makes! It's great to see someone else's take on supplies I use and get inspirations from these, and hopefully you'll get some inspirations too.

Simply click on the images to find the tutorials over at Jennifer's blog...

http://www.thelifeofjenniferdawn.com/2014/04/paper-garland-made-from-pink-flamingo.html


http://www.thelifeofjenniferdawn.com/2014/04/crafting-with-buttons.html

Wednesday, 2 April 2014

How to Make Tissue Paper Flowers

I found a lovely book in a second hand shop the other day. It was a girls' annual from 1985 and had lots of great pictures and articles in it; it was also falling to pieces with a broken spine and had lots of scribbles on some of the pages - perfect for upcycling!

I started to cut it up to take images for card making and to add pieces to ephemera craft packs when I found a lovely page showing you how to make tissue paper flowers. So I thought I'd give it a go and turn it into a tutorial for here!

How to make a tissue paper flower

This is the original tutorial from the book...

Taken from 'Jinty Annual 1985'


It's a very simple process. All you will need are:
  • tissue paper
  • a paper clip or pipecleaner
  • scissors

Step 1

Cut the tissue paper to the size you want. On the page (and in this tutorial) 6 sheets of tissue paper are used which are 6 x 9 inches each. This has made a final flower that has a diameter of 5 inches.

 Step 2

Place the tissue paper flat in front of you then start to concertina the paper from one of the shorter ends folding it back and forth (like folding a paper fan).

paper flower tutorial

Step 3

In the original tutorial you use a pipe cleaner for this step to form a stem but I've used a paper clip as I wanted a flat back. Whichever you're using, place it in the middle of the folded paper to secure it.

how to make a paper flower

 Step 4

Now cut the ends of each side of the folded paper to create the shape of the petals.

how to make paper flower decorations


how to make paper flower decorations


  I wanted to make a rose style flower (like the big red one in the picture) so I cut the ends to be rounded.


Step 5

Now spread out the petals to form a circle turning the edges of the paper up to help it keep its shape.


Step 6

Next carefully pull up each layer of tissue to create the layers of petals.


And then you'll have your finished flower!

Handmade paper flower

   
I'll be using these to decorate all kinds of things. I think they'll look great instead of a bow on wrapped gifts or as table decorations. I'm going to make some smaller yellow ones for Easter decorations too!


Saturday, 29 March 2014

Easter Egg Greeting Card Tutorial

I love to find inspiring sites full of ideas, tutorials and general craftiness. And I like it even more when I get to be part of that site!

Rook No.17 is just this kind of place with lots and lots (and lots and lots....) of crafty inspirations including cake art, recipes and craft tutorials to name just a few.

*Rook No. 17:  recipes, crafts & whimsies for spreading joy*
Over on the site you can now find my step by step Easter egg card tutorial. It's a simple way of creating a one of a kind greeting using scraps of vintage paper and a few basic craft supplies. As with all my tutorials, it's easy to follow how to with each step having full instructions and photos to follow. 


 http://www.rookno17.com/2014/03/diy-vintage-paper-easter-egg-art-guest.html?utm_source=bp_recent&utm-medium=gadget&utm_campaign=bp_recent

http://www.rookno17.com/2014/03/diy-vintage-paper-easter-egg-art-guest.html?utm_source=bp_recent&utm-medium=gadget&utm_campaign=bp_recent

If you'd like to make one (or a few) yourself, head over there now!


Just of a few inspirations you'll find over at Rook No. 17


This cake art brings a whole new meaning to the dish 'crab cakes'!


A retro recipe revamp - Pecan penuche with chocolate and sea salt

Sour dough grilled cheese sandwich - sounds delicious!
Make some pom pom sheep to go with your Easter card!

Retro clip art - and it's free to download and play with in your own non-commercial crafting!


So what are you waiting for? Head over and say 'hello' to Jenn (the genius behind Rook No. 17) and get crafting!


Tuesday, 18 March 2014

Make a unique decoupaged gift or storage box

Decoupage is a great way create unique pieces and use vintage papers and ephemera in crafting. And it's simple to do too! If you use old boxes and book pages, as I've done in this tutorial, it's also a thrifty way to make special gift boxes or storage boxes for your home.

Decoupage tutorial - Pink Flamingo Handcrafting

Obviously, the final use of the box depends on the size you choose to decoupage. Here I use a small box that was originally a gift box for a purse. It's a nice one to use as it's plain apart from the original logo on the front so I've just covered the lid. If you wanted to create a very fancy piece you could cover the whole thing!

You will need:

how to make a decoupaged gift box
decoupaged gift box tutorial

  • A cardboard box (whatever size you need or have)
  • PVA glue
  • a brush to glue with
  • scissors
  • water
  • a book to cut up or a pack of vintage paper embellishments

Step 1

If you're using an old book, cut out the pictures you want to use to decorate your box. If you're using a bought pack of embellishments, choose the pictures you'd like to use.

Take the lid off the box. Without gluing them - place the pictures over the box lid to see how many you'll need and the best way to arrange them.

paper ephemera tutorial

Step 2

When you're happy with where the pictures will go you can start to glue them down. Spread PVA glue over the back of the picture and press it in place where you'd like it to go on the lid. Don't worry about using too much glue as it's important they're stuck down well. If glue splurges from under the picture you can either cover it with another picture or brush it out as you'll be sealing the box later.


decoupage using paper ephemera

Let some of the pieces hang over the edges of the lid. These can be trimmed later. Fill in small gaps with smaller pictures or leave some of the original box lid showing through.

decoupaging with vintage paper tutorial

Keep going until you're happy that the box is completely covered.

how to make a decoupaged gift box

Step 3

Turn the lid over and use your scissors to trim away any overhanging papers.

paper ephemera craft project

Step 4

Now you'll need to seal the pictures. To do this mix some PVA glue with a little water (I use a mix of about 5 parts glue to 1 part water, but it's not an exact science!). Take a brush and spread this mixture over the lid of your box. Make the layer thick enough to create a glaze but thin enough to not soak the box.

sealing decoupage

Leave the box to dry. I like to then give it a second coat with the glue and water mixture. Leave this to dry completely before using your box.

And there you have your unique decoupaged box. Try them in different sizes and with different papers to use in a variety of ways.

Decoupaged gift box tutorial - Pink Flamingo Handcrafting

Wednesday, 5 March 2014

How To Make Simple Cards using Vintage Paper Scraps

These cards are perfect for using up smaller pieces of papers you have left after other projects using vintage papers (that's how I came up with them in the first place!). And as they're quick and simple to make they're ideal for creating a few at once so you always have a card on hand for any occasion.

I'm showing you some of the shapes I like to use when making these card, but you can make them in any shape you like following the same idea.

how to make cards with vintage paper ephemera


You will need:

card making tutorial

  • various scraps of paper
  • pencil
  • scissors
  • glue (I prefer PVA)
  • card blanks
  • pen
  • card for making templates (or use templates you already have)
  • various embellishments you might want to add (eg, a button for the flower centre)

My templates

These are the shapes I like to use the most. The measurements have been included and they are intended for use on A6 card blanks (10.5cm x 15cm). The heart and kite are cut into 4 so smaller scraps of paper can be used and interesting combinations will give the cards a better look. 


card making templates by Pink Flamingo Handcrafting


Instructions

1. Choose the template you want to use. I'll use the heart shape throughout this tutorial. Place one of the sections on the 'wrong side' of a scrap of paper and use your pencil to draw around it. Do the same with the other template sections on other scraps of paper.

card making tutorial

2. Use your scissors to cut out each of the sections you've drawn in step one.

simple card making tutorial

3. Turn each section to show the 'right side' and (don't glue them at this stage) put them onto the front of the card blank. Check they fit on the card and that the sections match up properly. If the pieces don't quite fit trim any paper as needed.

simple card made using paper ephemera

4. Once you're happy with the paper's position, use you glue to stick each piece to the front of the card.

quick handmade card tutorial by Pink Flamingo Handcrafting

And you're done - just like I said, quick and simple! 

Extra Ideas
  • Add embellishments to your cards such as a button in the middle of the flower
  • Try using a variety of papers you would normally discard such as newspapers, magazines, junk mail or even paper packaging and labels from food packets
  • If you're using different patterns for each piece, try to stick to a colour theme to make them look coherent - or use the same pattern in different colours
  • Add a greeting under the picture if you know the occasion you'll use the cards for. You could stamp a greeting, print a greeting and stick it on the card front or use a shop bought sticker or embellishment
So now you know how to make them, why not create a whole set ready for you to use whenever you need a card?

Find this and other tutorials in my gallery at BeBetsy http://bebetsy.com/author/simply-author/Pink+Flamingo+Handcrafting/

Sunday, 2 February 2014

Quick and Simple Valentine Cupcake Toppers

In the run up to Halloween last year I wrote a tutorial showing how to make some cupcake toppers for the occasion which proved to be the most viewed post of the year. So with another holiday coming up I thought it would be good to use the same method with different shapes (unless of course bats and mummies are romantic for you!).

Here then are some quick and simple Valentine's Day cupcake toppers. They're fun to play around with trying different colours and patterns too; try using old books or music sheets of your loved one's favourites.

Valentine Cupcake Toppers

Valentine cupcake topper tutorials by Pink Flamingo Handcrafting


You will need:

  • various papers
  • glue (I prefer PVA)
  • cocktail sticks
  • scissors
  • pencil
  • ruler
  • black pen
how to make valentine cupcake toppers

These are the shapes I've used. If you want you could print this image and use them as templates or draw your own.

Valentine templates

Step one

Draw the shape/s you want onto the reverse of one of the papers you've chosen. You will need to draw 2 shapes for each topper you want to make.

Make your own Valentine cupcake toppers

Step two

Use your scissors to cut out the shapes. Place the pairs of shapes 'wrong side' to 'wrong side' and make sure they match up. If one is a little bigger or a different shape just cut around them to make sure they match.

Valentine craft idea

If you're making the lips or roses use a black pen to draw the details on now before you make the topper. Follow the lines in this picture.

Valentine craft idea by Pink Flamingo Handcrafting

Step three

Place one shape down flat with the 'wrong side' facing upwards. Spread a thin layer of glue all over the shape.

Heart cupcake topper tutorial by Pink Flamingo Handcrafting


Step four

Place a cocktail stick in the centre of the shape (about half way up) with the remainder of the stick coming straight down.

Valentine paper craft tutorial

Step 5

Take the other shape in the pair and spread a layer of glue over the 'wrong side'.

Heart cupcake toppers paper craft tutorial

Step 6

Line up the two shapes glued side to glued side and press them together. (This is where a wet glue like PVA is useful as you can move the shapes around a little to line them up).

Heart cupcake topper tutorial

And there you have it, a finished cupcake topper! Repeat the steps for as many toppers as you want to make.