| My lovely little prize |
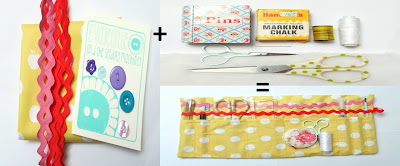
Now, I love the idea of sewing and buying lots of gorgeous fabric and buttons, but I'm not very skilled at it. I can do basics and if it involves sewing two pieces of fabric together and adding stuffing I'm fine. My brain and sewing machines never seem to be on the same wavelength so I hand sew items; and patterns puzzle me so I either take things to pieces and try and work out how they're made or play around with paper to make a pattern of my own. And with my prize this is what I did. I tried to think of a few ideas and something I hadn't made before and settled on the idea of a roll to keep my crafting tools in.
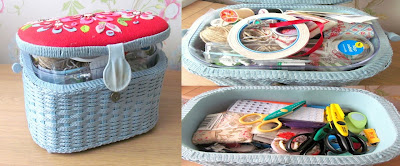
Even though I don't do too much sewing, I have a sewing basket to keep my supplies in. Over time it's become the go to place for keeping any crafting tools and has got a little overcrowded. I'm usually very neat and like everything to have a place, but again when it's linked with sewing my brain goes haywire! That's why I liked the idea of making a place to keep all the tools I'll need for the project I'm working on instead of having to search through my basket all the time.
This very messy sewing basket led to this idea...
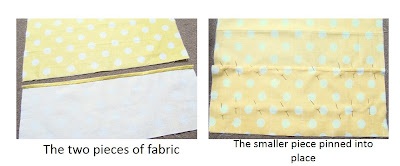
First I cut the yellow fabric into two pieces with one of the pieces being just under a third of the entire length. On this smaller piece I folded along one of the long sides to make a hem and sewed it in place. I then pinned this piece along the bottom of one of the short sides of the bigger piece of fabric and drew some lines with marking chalk for where I wanted the pockets to be.
I then sewed along the chalk lines with yellow cotton to secure the pockets in place. I thought about which crafting tools I wanted to keep in it (scissors, pen, pencil, tape measure and so on) and measured the pockets to be able to hold these.
| The pockets sewn in place with yellow cotton |
Next I wanted to use the rickrack. I thought about adding it just as decoration (originally I thought along the top of the pocket section but then realised I should have done that before sewing the pockets in!) but then I thought I should make it useful. I decided to place a row of each colour above the pockets - one to help hold longer items in place and one as a place to keep smaller accessories such as paper clips and pins. I pinned the rickrack in place and sewed it just in a few places above the sewn lines of the pockets so tools could go behind it.
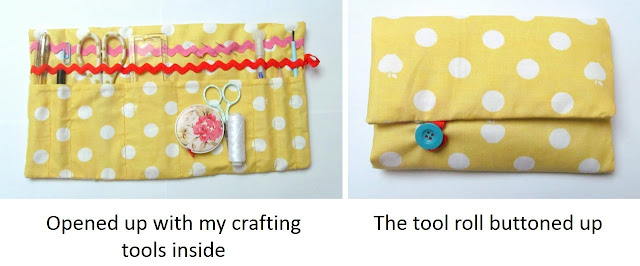
I then placed the two right sides of the fabric together and sewed down the two shorter sides. I added a small loop of the red rickrack to one side to use for the fastening on the front before I sewed the right hand side. After this I turned the fabric the right way around again and inserted a piece of thin wadding into the 'pocket' and sewed along the bottom edge turning the two raw edges in first to give a neat finish. I finished the tool roll by adding a button to where the rickrack loop reached when the roll was folded over.
I was really pleased with the results, especially as I don't class myself as a 'proper' sewer. It might not be the most advanced project, but it was an achievement for me! And I get to have a neat sewing basket again thanks to the lovely prize that Lindsay sent me.


For someone that doesn't sew much, you've done a grand job there. :-)
ReplyDeleteThank you! I can be quite creative when I put my mind to it ;)
DeleteWonderful. I have a contest on my blog right now if your in an entering mood.
DeleteLovely project! Love it! The sewing box is also gorgeous!Thanks so much for sharing! Would love to have you visit my blog sometime.
ReplyDeleteHave a fabulous day!
Hugs from Portugal,
Ana Love Craft
www.lovecraft2012.blogspot.com
Thanks Ana. I'll pop over to you and have a look!
DeleteGreat project and congratulations on winning so many contests!
ReplyDeleteThanks Jamie! I just can't resist a competition!
DeleteCongrats on winning the competition. This is absolutely adorable!
ReplyDeleteI wanted to let you know that I am featuring your blog at this week's Harvest of Friends Weekend Blog Hop.
Kelly
Our Everyday Harvest
Thanks Kelly! Being featured is like winning another competition!
DeleteCongrats! and this is really nicely made!
ReplyDelete-Reshama @stackingbooks.com
Thanks Resh!
DeleteYay for winning crafty goodies! This looks great! :D I found you via VMG206
ReplyDeleteWinning competitions is always fun and when it's crafty goodies it's even better!
Delete