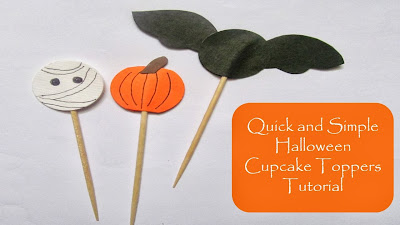
Take care if you're making these with young children as there are small parts and pointy cocktail sticks. Always supervise children when they are eating cupcakes with these toppers in.
You Will Need
How much of each depends on how many toppers you want to make:- Thin card or thick paper in white, orange, black and brown
- A circle punch or a coin to draw around (I use a 1 inch punch)
- A black pen
- A pencil
- Scissors
- Cocktail sticks
- A wet glue such as PVA
Pumpkin Cupcake Topper
1. Use the circle punch (or draw around a coin) on the orange paper to make two circles.
2. Cut a little piece off the top and bottom of each circle so they look more pumpkin shaped.
3. Use the black pen to draw lines down each pumpkin. Make the lines at the side curved to make it look rounder. Cut two small stems out of the brown paper.
4. Spread glue on the back of one of the pumpkins. Spread it thinner around the edges (so it doesn't splurge out in the next step) and add more in the middle. Place a cocktail stick in the centre of the glue.
5. Now press the other pumpkin (lined side facing out) onto the glue to make a double sided topper. Spread glue onto one of the brown stems and stick it to the top of the pumpkin on one side. Making sure the stems will fit together, spread glue on one side of the other stem and fix it to the other side of the pumpkin.
Bat Cupcake Topper
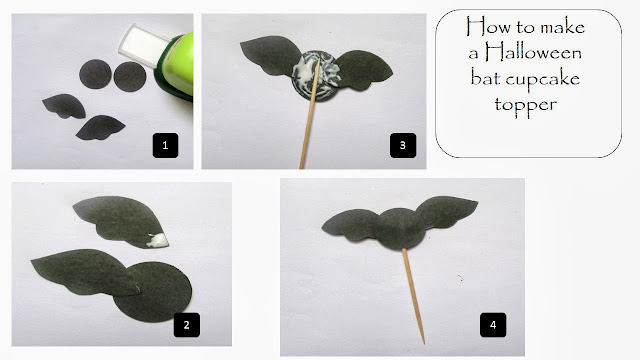
1. Use the hole punch (or draw round a coin) on the black paper to make 2 circles. Cut out two bat wing shapes following the shape in the pictures.
2. Put a little bit of glue on the tip of one wing and stick it onto the left edge of one of the black circles. Do the same with the other wing sticking it across the circle on the right hand side.
3. Spread glue over the back of the black circle. Put more in the middle to help secure the cocktail stick and less around the edges so it doesn't splurge out in the next step. Put the cocktail stick in the middle of the circle.
4. Press the other black circle over the glue to finish the bat cupcake topper.
Mummy Cupcake Topper
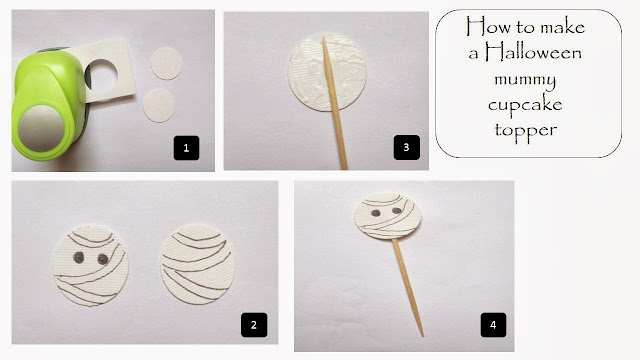
1. Use the hole punch (or draw round a coin) on the white paper to make two circles.2. Use a black pen to draw two black circles for eyes on one of the white circles. Add some lines to make them look like bandages. On the other white circle (which will be the back of the head) just draw some lines for bandages.
3. Spread glue on the the reverse of the circle without the eyes. Put more glue in the middle to help secure the cocktail stick in place and less glue at the edges (so it doesn't splurge out in the next step). Place the cocktail stick in the middle of the circle.
4. Now press down the circle with the eyes onto the glued circle. Make sure it's the right way up!
Now all I have to do is get baking!


I especially love the bats! I might try these for my daughter's school treat at Halloween!
ReplyDeleteThanks Erin! What a lovely idea to treat your daughter.
DeleteWhat a cute idea. I saw it on Polkadots on Parade. Thanks for sharing!
ReplyDeleteThank you Angie!
DeleteAwesome!! I love my 1" hole punch!!! This is another great use for it!
ReplyDeleteThanks! They are extremely useful aren't they?
DeleteCute! I like to make toppers like this for cupcakes and to skew fruit or cheese in the kid's lunchboxes.
ReplyDeletewww.mamagetsitdone.blogspot.com
Great idea Janell, I hadn't thought about using them as food skews! They'd look great like that for nibbles on a Halloween party table too.
ReplyDeleteThese are so cute! Pinning. I have a giveaway for $50 to ElemenOPillows going on right now if you want to come enter!
ReplyDeleteCorey from TinySidekick.com
Thanks Corey!
DeleteThese are super cute! :) I found you at the Tickled Pink party.
ReplyDeleteThanks - I like cute Halloween so I don't get scared too much!
DeleteSuper cute!! When I make cupcakes for my kiddos class Ill be sure to make these!
ReplyDeleteThanks for sharing at the Life of the Party! I pinned these for later :)