Wednesday, 31 July 2013

Unique and personal gifts

Today I thought I'd share an idea that's crafty and makes a good gift. So whether you want to make your own or it gives you an idea for a gift, here are my make your own gift vouchers. 

Everyone knows someone who's difficult to buy for.  With me it's my mum.  She's not someone who likes to have lots of things and buys what she likes and needs for herself.  Coupled with this, her birthday is just after Christmas so all my ideas have run out by then!

This is when I first got the idea of making some gift vouchers that she could spread through the year and would give her something she really appreciated - in this case fresh flowers.  So I made a little cardboard wallet which tied at the front with ribbon and filled it with floral paper gift vouchers each for a bunch of flowers that she could give me anytime she'd like some.

Then this got me thinking... these would be great for lots of other occasions too; not only those who are hard to buy for, but also if you're short of money you can offer gifts of time and help or if you have specific skills you could offer those too.

It's a nice idea to make yourself either in a wallet or just paper vouchers in an envelope. Or for those who aren't so crafty I've put some in my Etsy shop too.

 make your own gift vouchers
These gift vouchers are available in my Etsy shop.

If you're stuck for ideas on what to write on your vouchers, these are some things I'd like to receive, as well as what others have told me they'd like too:
  • an offer to wash your car (something I would particularly love!)
  • an evening's babysitting
  • a trip to the cinema
  • taking you out to lunch
  • making your favourite meal for you (and doing the washing up!)
  • take you to your favourite shop and pick out an item as a gift
  • a box of chocolates whenever you like
  • set up your new laptop (or anything else technical I don't understand!)
  • giving you a manicure
  • doing the ironing for you
  • cutting the grass
These are just a few ideas.  Another gift I'd love is any comments left below for other ideas to write on the vouchers...!

Tuesday, 30 July 2013

How to Make a Russian Doll Gift Tag

I have a bit of an addiction to Russian Dolls.  I've been buying them for a few years and have run out of space on my book cases for them! I love the stories that the pictures on them represent and how they tell stories as you go down the layers to the littlest doll at the centre. They inspire my crafting too and here I'll show you how to make one of these cute gift tags (or a set...they are Russian dolls after all!).

russian doll gift tags

You will need:

A piece of plain card measuring 8cm x 5cm; a piece of patterned paper measuring 6cm x 5cm; a piece of peachy cream paper approx. 3cm x 3cm; a piece of brown paper approx. 3cm x 3cm; glue; a length of ribbon around 20cm; a black pen; a hole punch; a ruler; pencil; scissors; a 2p coin or a circle punch.

Make a Russian doll gift tag
I'm always thinking about upcycling.  The plain white card is cut out from a birthday card I was sent this year; the green patterned card is from a box of sweets; the peachy card and brown card are from the birthday card too which I've coloured with Pro Markers; the ribbon is a hanging loop from a top I bought.

1.  Take the piece of patterned paper to make the headscarf.  Cut the bottom 5cm edge into the shape in the picture. The middle of the cut should be about 2cm from the base.
make your own russian doll gift tag


2.  Glue this piece of paper to the plain card so that the top of the patterned paper is lined up with the top of the card.
make your own russian doll gift tag


3.  On the back of the tag, measure 1cm down and 1cm across at each of the the top two corners. Lightly draw a line diagonally between them and cut these corners off.
make your own russian doll gift tag

4.  Use the hole punch to make a hole in the middle of the tag on the top edge about 1cm down from the top.

make your own russian doll gift tag

5.  Take the peachy coloured paper and either draw around the 2p coin and cut it out or use your circle punch. This will be her face.

make your own russian doll gift tag


6.  Repeat step 5 to make a circle of brown paper for her hair.  Cut this circle in half and then cut it into the same shape as in the picture.

make your own russian doll gift tag


7.  Glue the hair onto the peachy circle making sure the edges meet at the top.  Using your black pen, draw 2 lines on each side of the parting in her hair.  On her peachy circle draw two dots for eyes with a little flick for eyelashes and add a smile.

make your own russian doll gift tag

8.  Glue the whole face to the tag in the centre under the hole made with the hole punch.  Make sure it's all on the patterned paper.

make your own russian doll gift tag


9.  Use the hole punch to make 3 little circles using the patterned paper.  Glue these down the front of the tag in line with the centre of the face so that they look like buttons.

make your own russian doll gift tag

10.  Place the ribbon through the hole at the top.  Tie it in a knot to secure it.  Cut the ends diagonally to make a neater finish.  Well done! You've finished your tag.

make your own russian doll gift tag


Variations to try: 
  • use different colour card and different patterned papers;
  • make it in a variety of sizes;
  • draw different expressions on her face;
  • use real buttons down the front of the tag;
  • use patterned corner scissors as an alternative to straight corners at the top of the tag. 

This tutorial can be found on Totally Tutorials along with lots of other great ideas!
    

Monday, 29 July 2013

3 Eco Friendly Ways to Make Wedding Decorations

Weddings are fantastic occasions.  Lots of celebrations, family and friends and decorations make them a wonderful time. But how can you help to cut the costs both financially and environmentally? One way is by getting crafting and upcycling!

Upcycling to make your own (or a friend's) wedding decorations is great for a number of reasons: 1. It's eco friendly; 2. it saves money; and 3. you can make it much more personal and meaningful for the happy couple. Here are my 3 favourite ways to craft for the big day.

1. Upcycled table confetti

Confetti looks great to decorate a table and to help it match in with the colours of the wedding.  You can easily make your own using paper punches in a favourite shape and an old book, map or sheet of music.  Does the happy couple have a favourite book? Is there a special place they've been too - or maybe are going to on honeymoon? What's a significant piece of music in their lives? Use these as a starting point to make it really personal.  And as it's made of paper, it's recyclable too!

Upcycled table confetti
This confetti is made from maps of Devon and Cornwall.

2.  Upcycled wedding favour bags

It's easy to make a little favour bag from the same type of papers as the table confetti.  I found the best way to make them the first time was by taking apart a little favour bag and using it as a template, which you can then adapt when you've tried them a few times. Again, it's a great opportunity to really personalise the celebrations. Do make sure the paper is thick enough though.

upcycled favour bag
This favour bag is made with a blank page from the back of a book, ribbon from a gift and an upcycled  paper rose (see my 'how to...' page for details).

3. Empty glass food jar flower holders

Save some jars from foods such as mustard, mayonnaise and jam, give them a good wash and use them to put flowers in as table decorations.  You can tie ribbon around them too for an extra touch.  I always save ribbon from parcels, presents and even hanging loops from tops I buy so these could be used to go with the upcycling theme; they won't all match, but if they're in the same colour or pattern family they'll give a nice eclectic look.

upcycled jars
These two mustard jars are decorated with ribbon saved from other places.
These are just 3 ways to make some eco friendly decorations.  There are loads of others too and if you're interested you can find lots of ideas by googling, looking on Pinterest or letting your own imagination run free!

Sunday, 28 July 2013

Craft Stall Displays

Another craft fair today! Back at Elsecar Heritage Centre with my upcycled and new paper crafts where I was last Sunday but this time for a vintage and craft fair. There were lots of very tempting stalls with such lovely items as vintage clothing, upcycled fabric bags, handmade jewellery and hand stamped fabrics. I did my best to resist but just couldn't help buying this fox ring from Hidden Quirks (before the fair even started!).

fox ring

The fair was in Building 21 on the site which used to be an ironworks and its industrial past can still be seen which makes for an interesting and unique setting.


Seeing a different kind of fair to the ones I usually sell at gave me lots of ideas for new and different stall displays.  I particularly liked some stalls which used old crates like shelves to give a rustic feel and build height for large items. Suitcases were also used to good effect either flat on a table and open to rummage through or stood on their side open like a cupboard with items hanging in them. There was also a stall that had garden trellis around it to hang different items on giving a lot more display space.  Not all of these could be applicable to a paper craft stall, but they were great to look at and enjoy.

These are some ways that I displayed my crafts today.

Pink Flamingo Handcrafting stall

I used safety pins to secure string to the table cloth to give extra hanging room and pegged my hand sewn hearts to them.  I also hung up packs of paper bunting in this way.

pink flamingo handcrafting craft stall

Chalk boards are really useful to add descriptions or special offers highlighting a certain product.  You can also easily change the price or the product to suit what's selling!

pink flamingo handcrafting earring stand
To match the theme of the earrings being upcycled, I reused an old picture frame to display them on.  It was from a picture that wasn't used anymore and I did stand on the glass breaking it when I was having a clear out (luckily whilst wearing shoes!).  I removed the glass and put a layer of wadding on the board which I covered with pink fabric from a pillow case.  I then strung ribbon across which I held in place with tape at the back and put the whole thing back in the frame.

Seeing all the other lovely stalls has given me plenty to think about in terms of display and if I can find some smaller crates I'd love to use them on my stall.  I only have one more summer fair and then I'm taking a craft fair break until the Christmas fairs start in November - by which time I might have found some crates!


Saturday, 27 July 2013

How to Make an Upcycled Paper Rose

Paper flowers make lovely additions to lots of crafting projects.  They make great embellishments for cards, gift tags and gift boxes as well as being decoration for anything from notebooks to table settings. One of my favourites (and easiest!) to make is a paper rose, and here I'll show you how to make one too. This tutorial is suitable for adults and children - but make sure you have adult supervision to use scissors.

I like to make them by upcycling paper from old, falling to pieces, unloved books, music sheets and maps, but feel free to use whatever paper you like.  Remember, if you are upcycling the idea is to make something that wasn't useful any more have a new purpose - so don't just rip up anything! Think if it's past its best or if it will be of use to anyone first.


a book to upcycle
This is the book I used which is clearly falling to pieces and has missing pages.  It went from this ...

upcycled paper rose
...to this!


Instructions for making an upcycled paper rose

You will need: a square of paper about 6cm x 6cm (2 1/2 inch x 2 1/2 inch); glue (I like to use PVA); scissors; a quilling tool or cocktail stick.

tools for making a paper rose

1. Take the square of paper and use your scissors to round each corner. (Ask an adult to help if you're one of my younger readers - always be careful using scissors.)
how to make a paper rose

2. Now cut into the paper about 1 cm (1/2 inch) down from the top right hand corner.
paper rose instructions
3. Continue cutting along the paper stopping about 1 cm (1/2 inch) from the left hand side.  Turn the paper clockwise and continue cutting.  Keep cutting in this spiral fashion until you have a finished paper spiral.
paper rose instructions
4. Using your quilling tool or cocktail stick, take the start of the spiral where you first cut and start to roll the paper following the spiral towards the middle.
how to make a paper rose
5. When you reach the middle of the spiral gently take the rolled up paper off your quilling tool or cocktail stick while holding the paper gently in place.  Slowly let go of the roll of paper a little until it unfurls to look like a rose.
make a paper rose
6. Now put some glue onto the circle of paper that was in the middle of the spiral and is now at the bottom of the rose.  Stick this circle to the base of the rose and hold for a few seconds to fix it in place.

upcycled paper rose tutorial


 And there it is, your finished rose!

upcycled paper rose
Once you know how to make them you can have fun trying different effects. Try...
  • cut the original square of paper with a wavy edge instead of straight;
  • colouring the edge of the square of paper with inks or crayons;
  • using different papers - books, maps, pictures, magazines;
  • cutting the paper to different sizes. 
This project and lots of other crafty ideas can be found at:
http://totallytutorials.blogspot.co.uk/

Friday, 26 July 2013

My Favourite UK Crafter of the Week - Children's Home Decor from Button Owl


One of my favourite things about being an online crafter is the crafting community.  Wherever I look, whoever I contact, whatever I want to find there are always loads of great products, advice and ideas from such friendly people. So I thought I’d put all that research (or being nosey) to good use by featuring one of my favourite UK crafters every week.  (That’s not to say I don’t like, or won’t feature crafters from other places!).

This post is in no way sponsored or influenced.  Each post will feature shops I've found myself and genuinely admire.  The opinions are my own, the quotes are from the crafter. Here's my first favourite...

Button Owl

I first came across Button Owl one day on Facebook.  There was an adorable picture from a craft stall with the cutest animal cushions. I made a comment that this was the type of stall I’d spend my money on before I’d made any when I do craft fairs (which often happens) and followed the links to the online shops.  And I fell in love with the cute creatures! 
animal cushions
The cute cushions that first caught my attention.  Jungle Friends set of 3 cushions £50 Button Owl


I contacted Roz McKenzie, the talented crafter behind Button Owl, about looking for a present (no more details though, just in case the recipient is reading!) and she quickly replied with details and a friendly message.  She also told me some more about herself and how she got started by being inspired by her mother’s dress making which Roz was involved with. This experience led her to studying at the Royal School of Needlework and learning ‘traditional embroidery techniques such as the Coronation gold embroidery which is placed on the Coronation robes when a King or Queen is Coronated’ and teaching embroidery too.

button owl t shirt
I can't resist a dinosaur! Applique T Shirt £12 Button Owl

After Roz ‘diverted for a while’ working in London, she decided to start making and creating again.  This was spurred on when she had her two daughters as she ‘couldn't ever find really unique items to place in their rooms’ so decided to make them herself – and this is when Button Owl was born. 

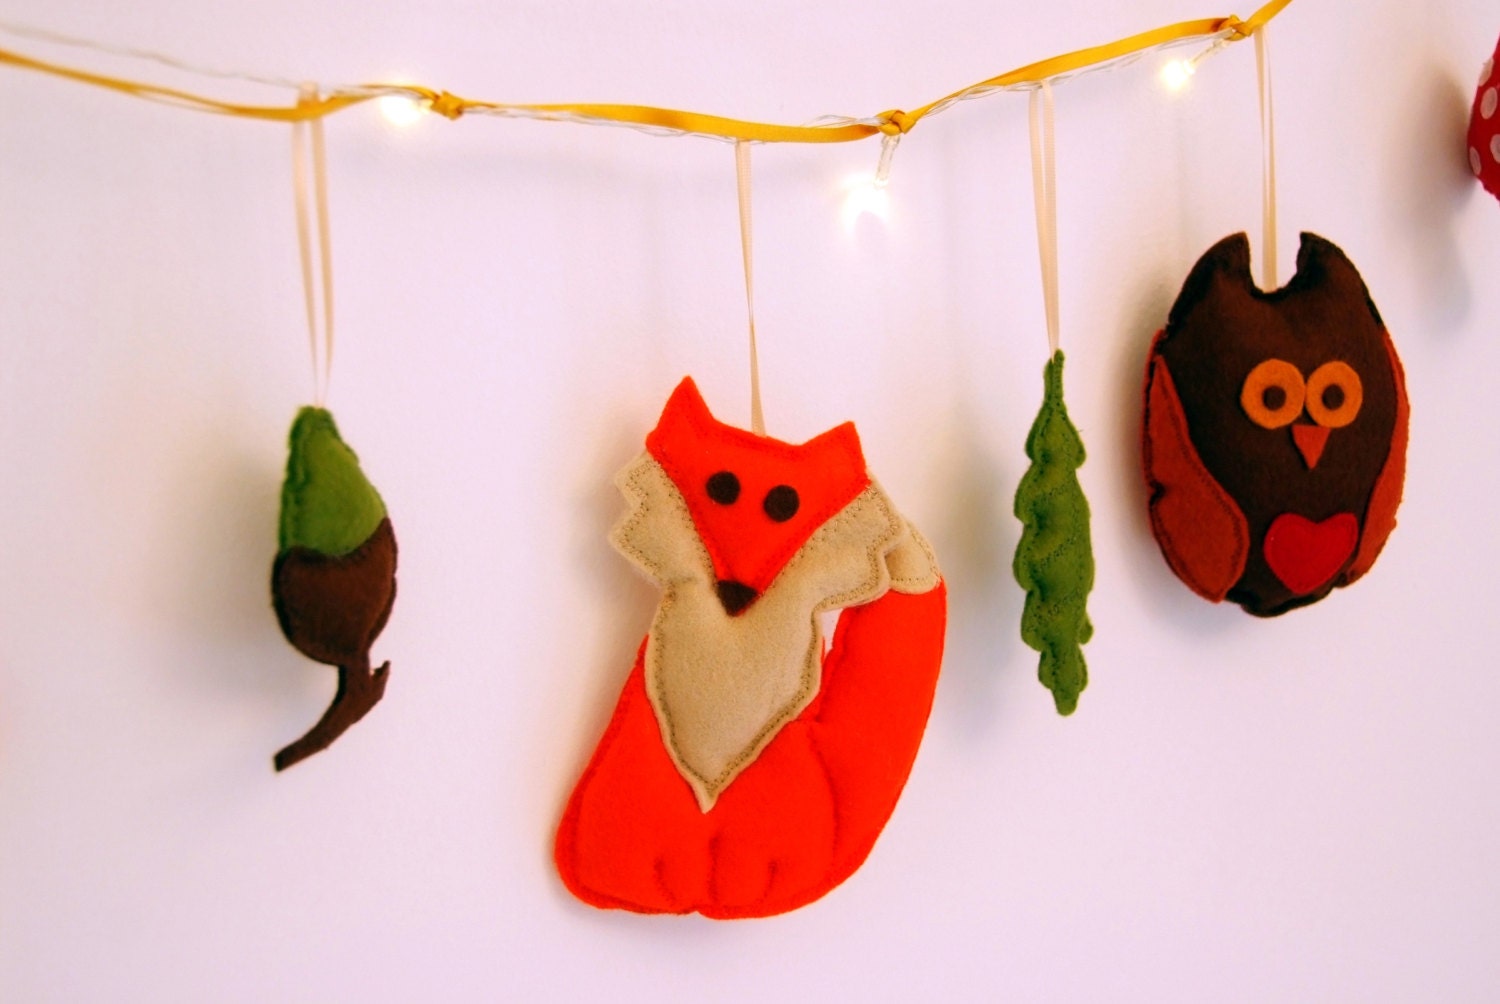
felt fox woodland garland
An adorable woodland garland with fairy lights. £26 Etsy

Roz’s online shops stock a variety of adorable, handmade and colourful characters in the form of cushions, wall hangings and appliqued t shirts as well as other clothes, hair accessories and soft furnishings for children. She loves working with felts as ‘they can be moulded to different shapes and are lovely and soft in beautiful varied colours’ which I think makes her animals all the more appealing. 

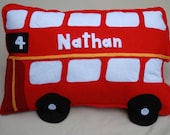
bus cushion personalised
 How could any little boy or girl resist? Personalised London Bus Cushion £18 Etsy

I’ve featured some of my favourites here which I think make lovely presents for children (and adults – I’m not above having an animal cushion or two around the house!) but do have a look for yourself using the links below as there are too many to feature here and I’m sure you’ll find favourites of your own. 


I’ll leave the last word to Roz, which I think will resonate with many crafters out there, ‘I absolutely love the thought of people having and loving something so unique and personal which I've handmade.’

You can visit and shop with Button Owl here: